- All Collections
- How To
- How to Make A Board Private and Public
How to Make A Board Private and Public
Managing Board Privacy Settings in ProductHQ
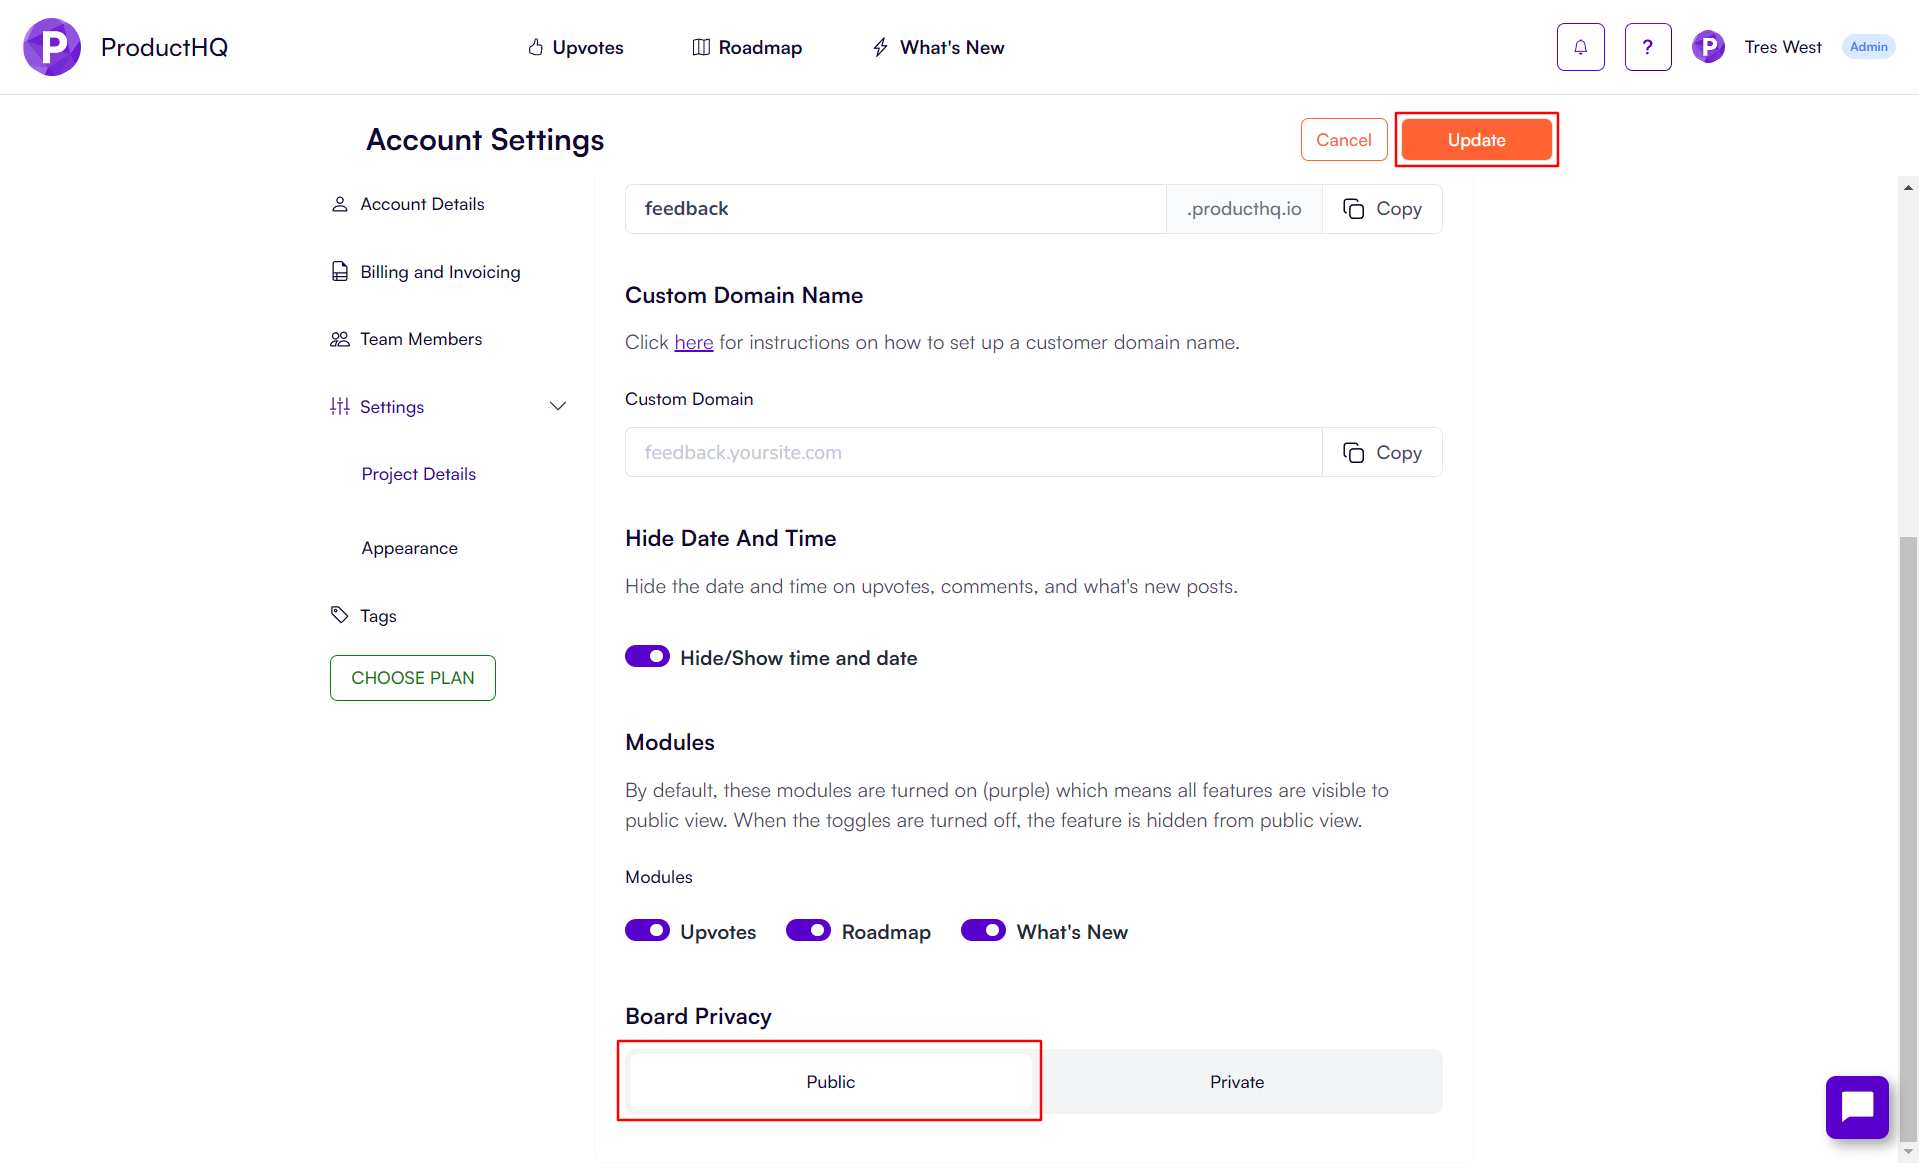
- Accessing Board Privacy Settings
- Navigate to Account > Settings > Project Details
- Locate the Board Privacy heading
- To make a board public:
- Click the public toggle
- Next, click the Update button in the top right
- Finally, check the public board to make sure it's visible
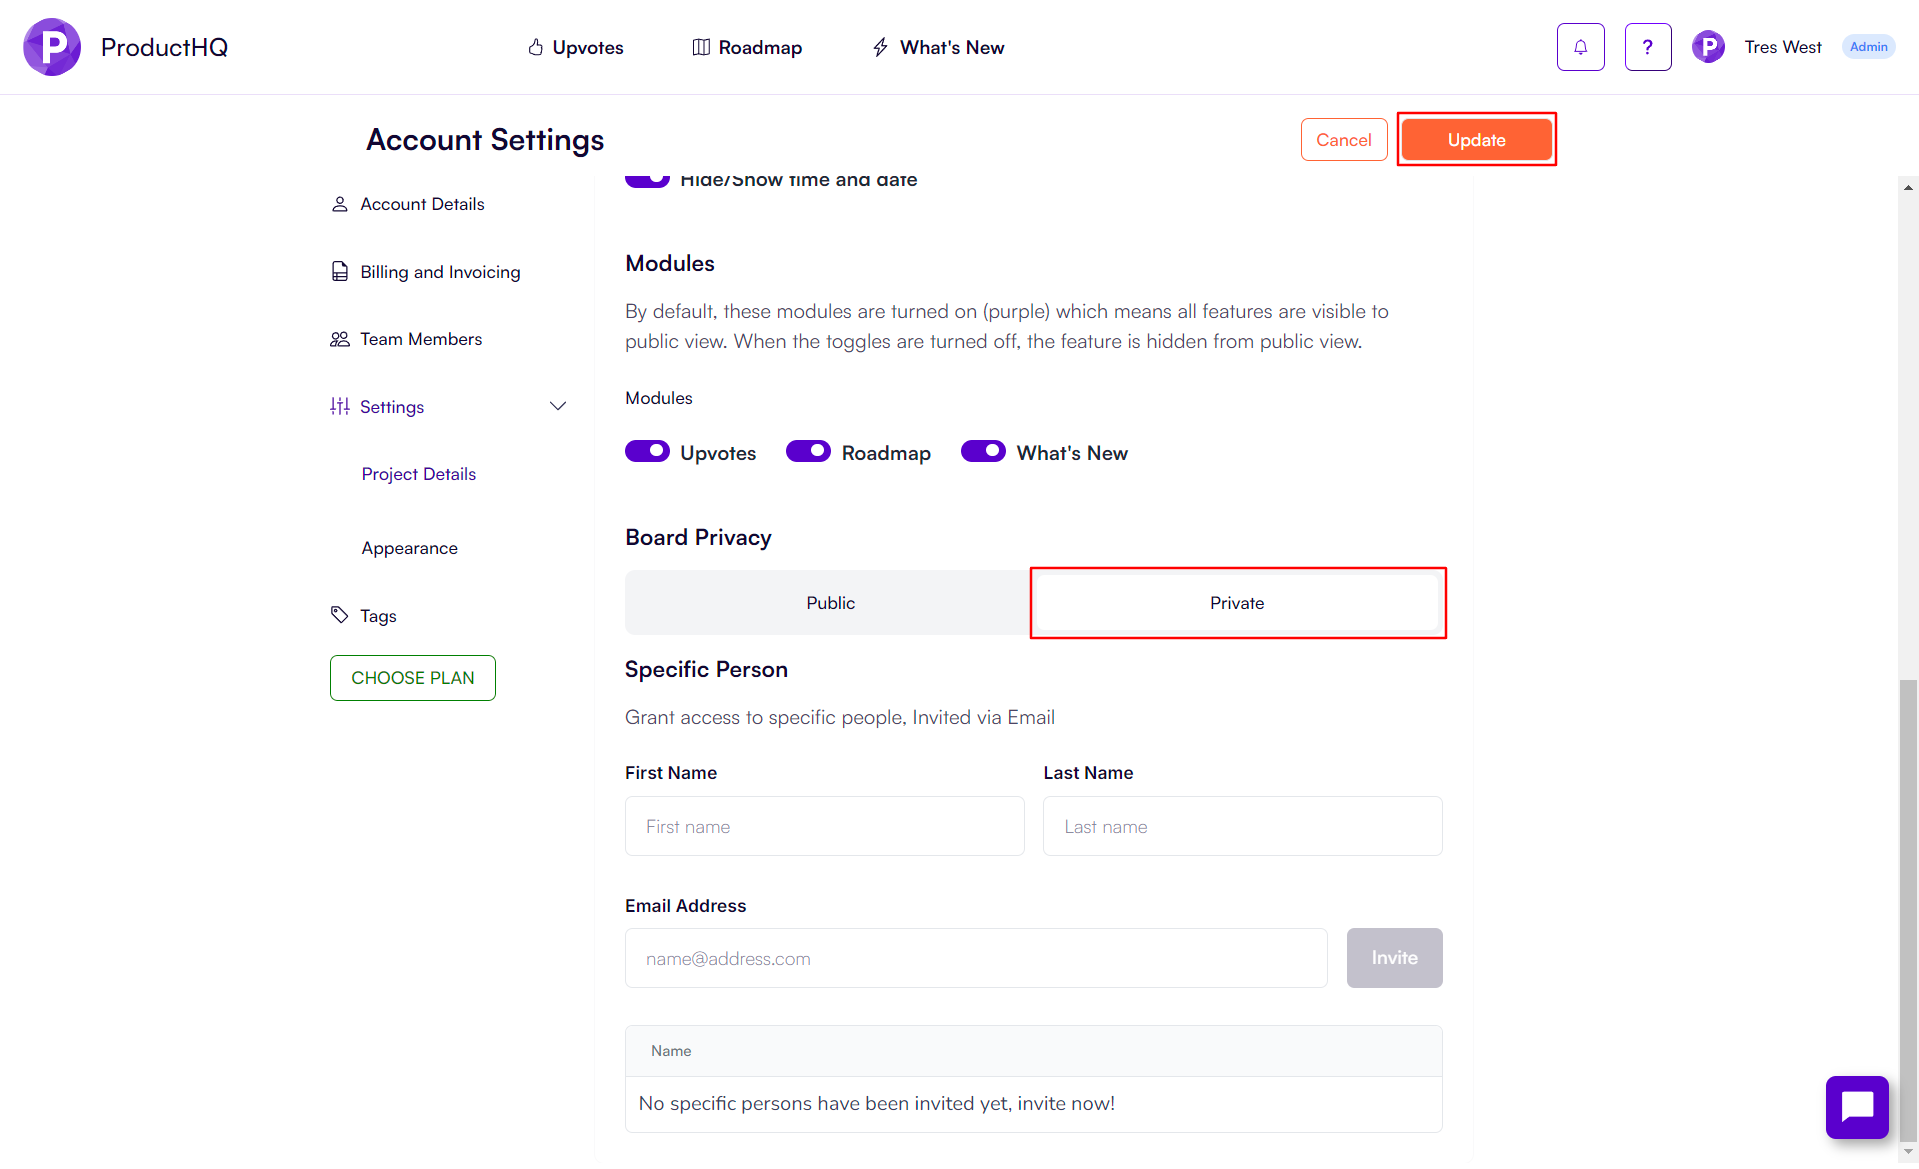
- To make a board private
- Click the private toggle
- Next, click the Update button in the top right
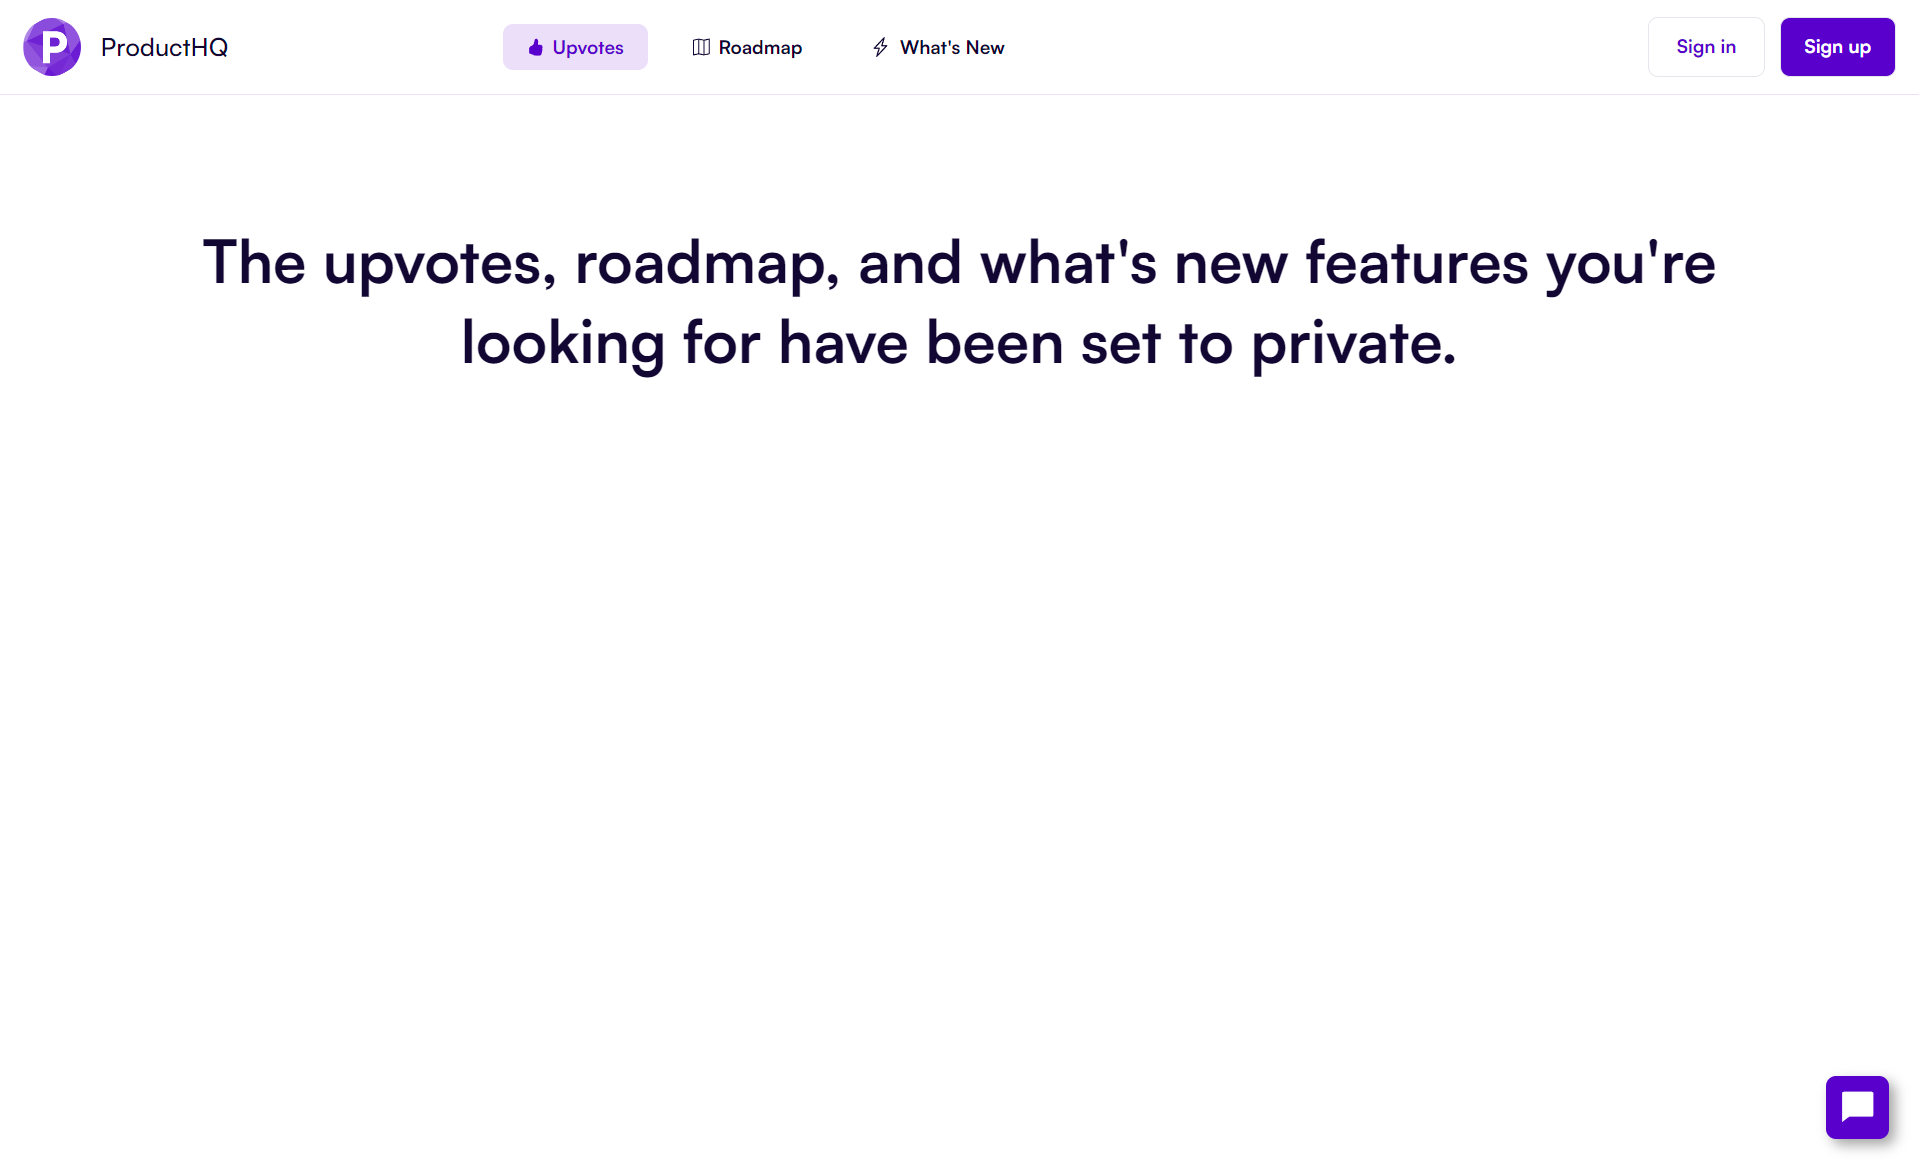
- Finally, check the public board to make sure it's no longer visible. You should see this message.
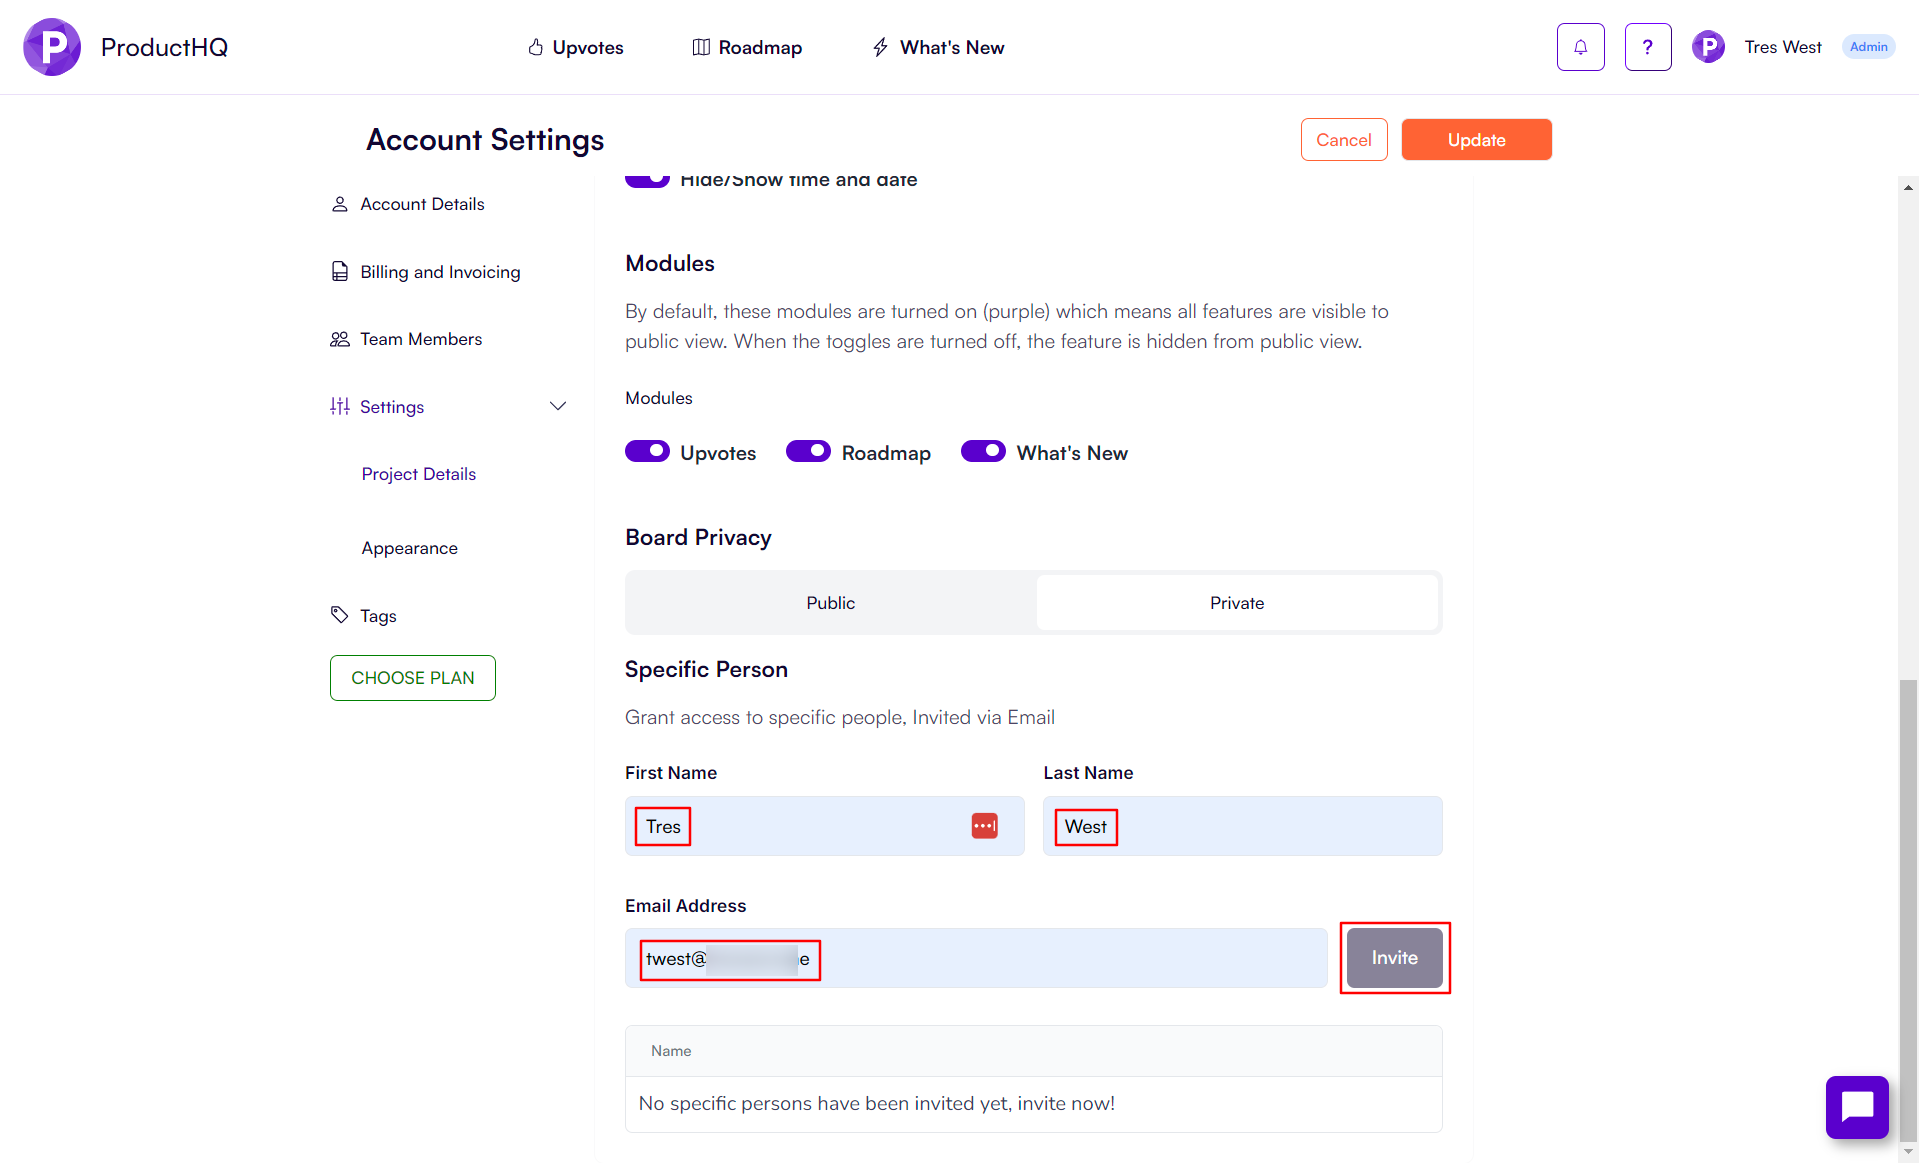
- Inviting someone to a private board:
- Find the "Specific person" heading
- Provide their first and last name and their email address
- Click the invite button
- An email will be sent to the invited person
- The email will contain a verification link
- Upon clicking the link, the invitee will be directed to the signup page
- An invited user:
- They will get an email with a link. They should click the link to accept the invite and start the account creation process.
- Once their account is created, they will receive another email verification email to maintain security standards.
- Once they have verified their email, they will be able to interact with the private board
Did this answer your question?
![IMAGE]()

