Roadmap Section Admin Guide
This guide will walk you through the steps to effectively use the 'Roadmap' feature and maximize its potential in managing and visualizing your product roadmap. Let's get started!
1. Accessing the Roadmap Section
- Open your web browser and go to https://app.producthq.io/roadmaps-admin
- Log in to your ProductHQ admin account using your credentials.
- Once logged in, navigate to the 'Roadmap' section using the top menu.
2. Roadmap Overview
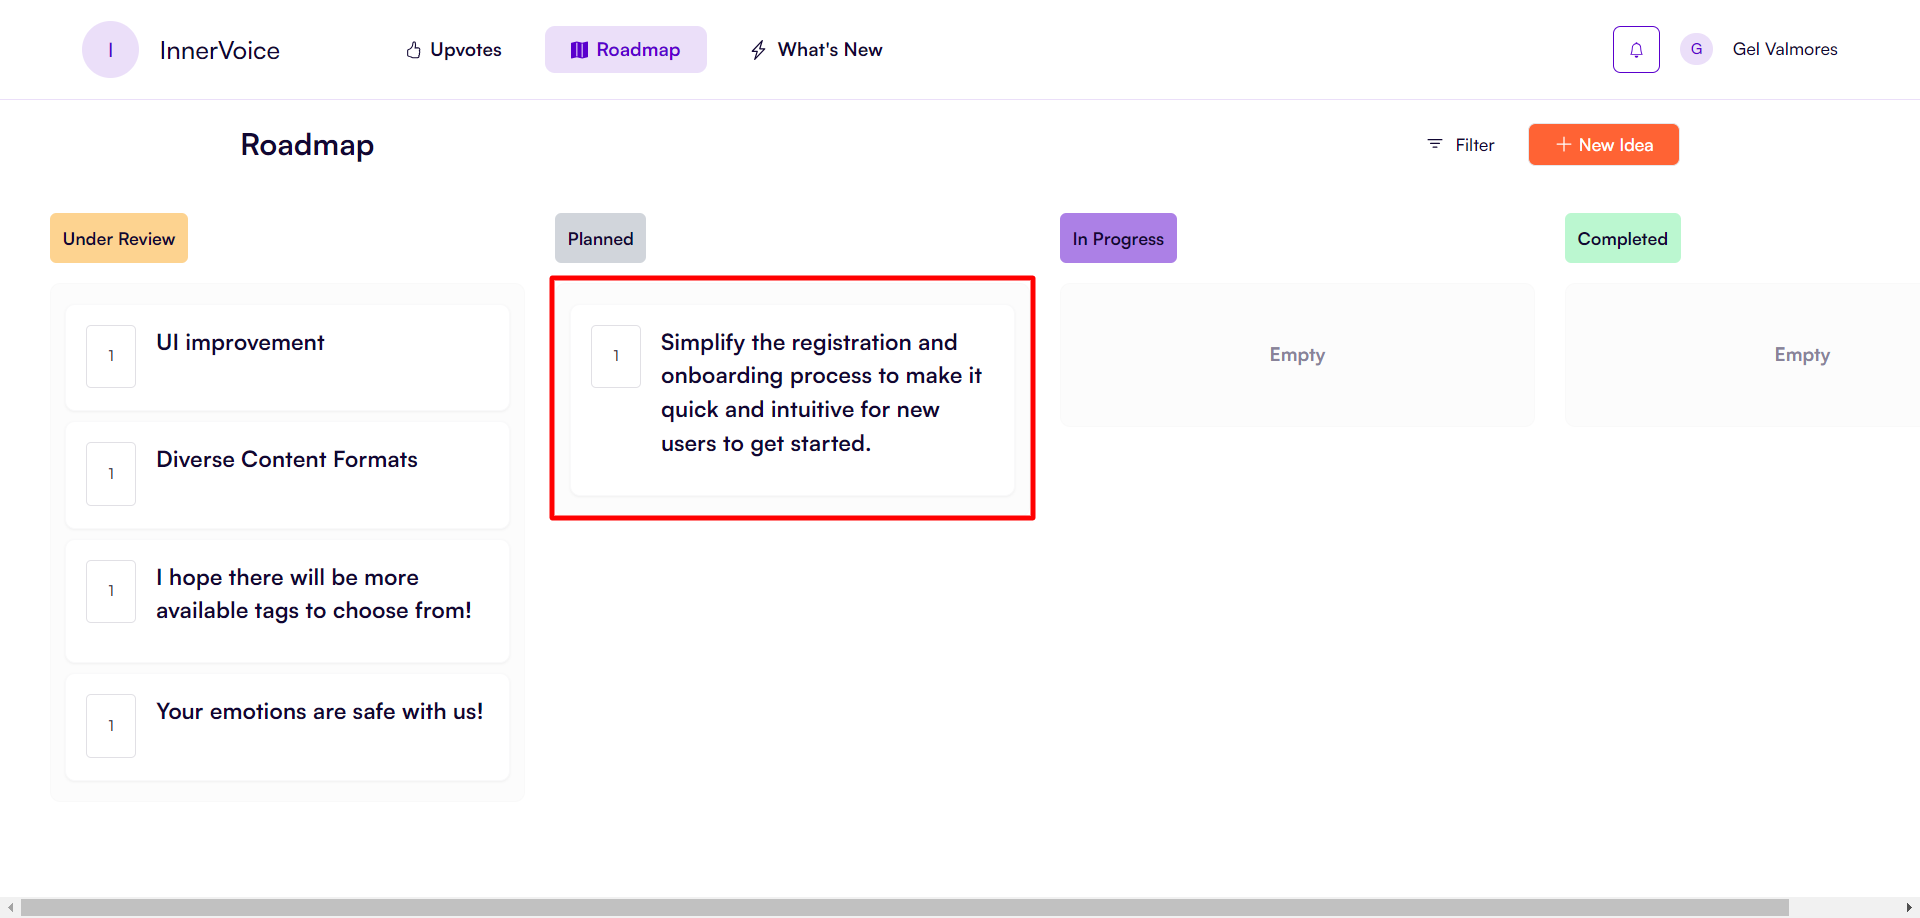
The 'Roadmap' section provides you with a visual representation of your product roadmap, allowing you to plan, prioritize, and communicate your product strategy effectively. It helps you keep track of upcoming features, prioritize initiatives, and align your team around a shared vision.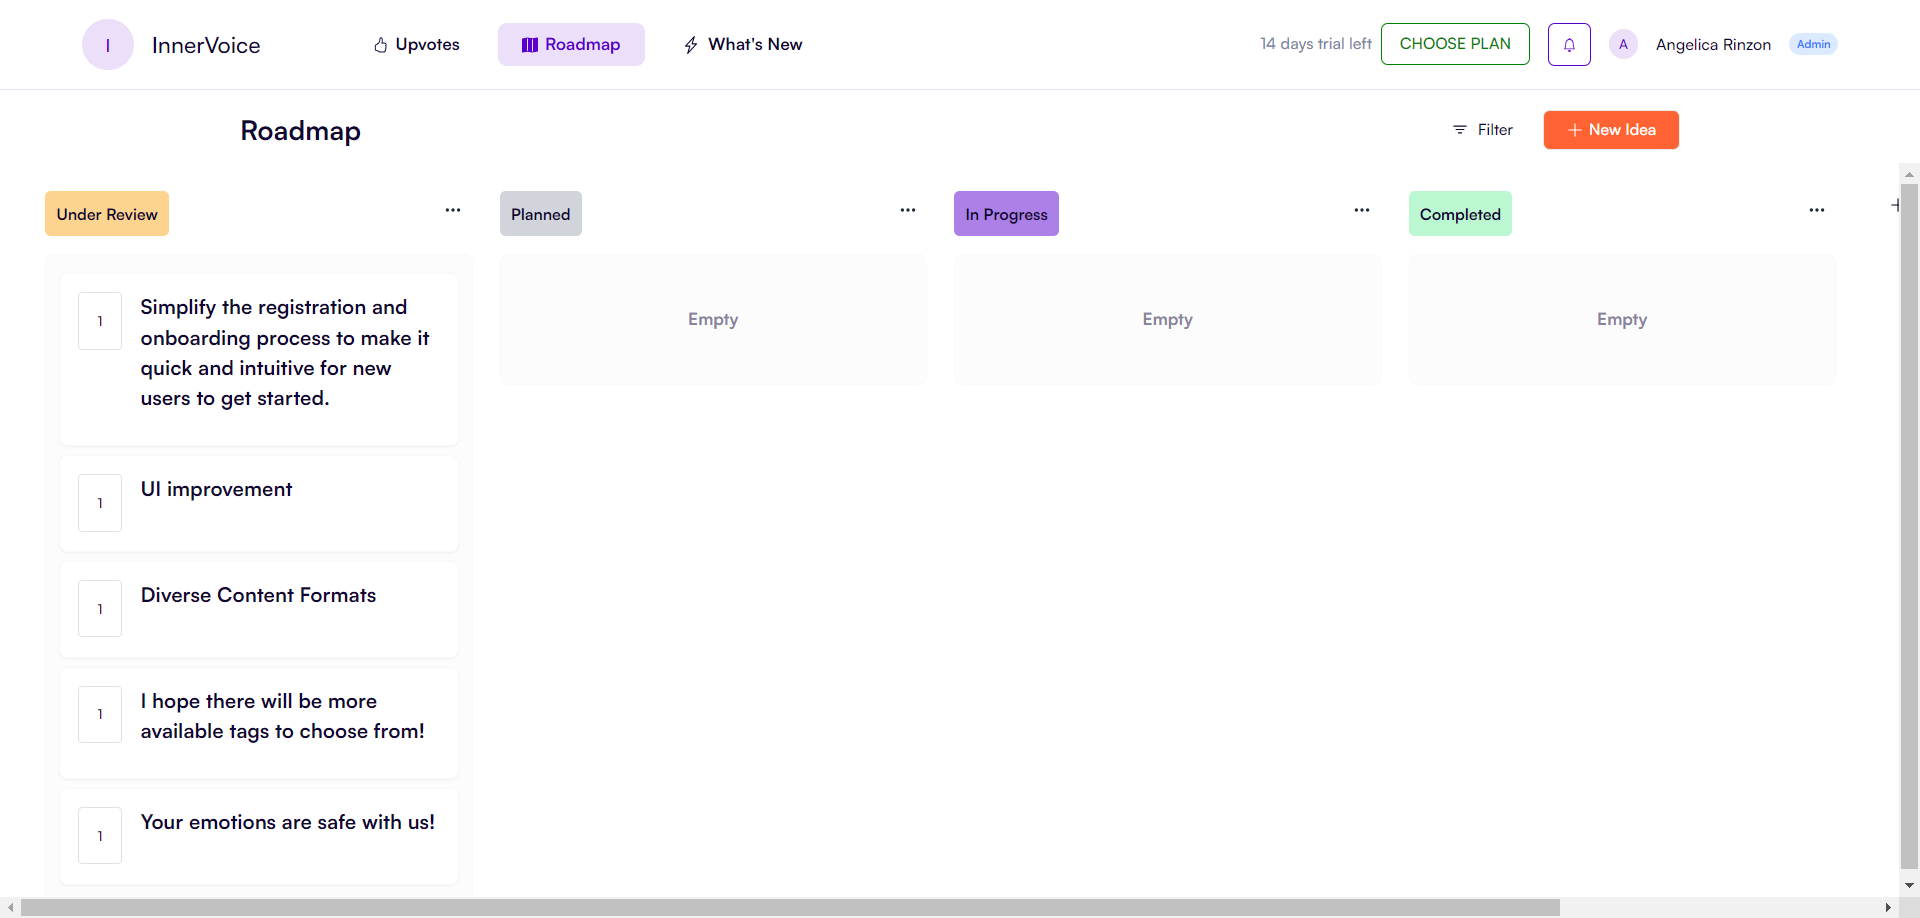
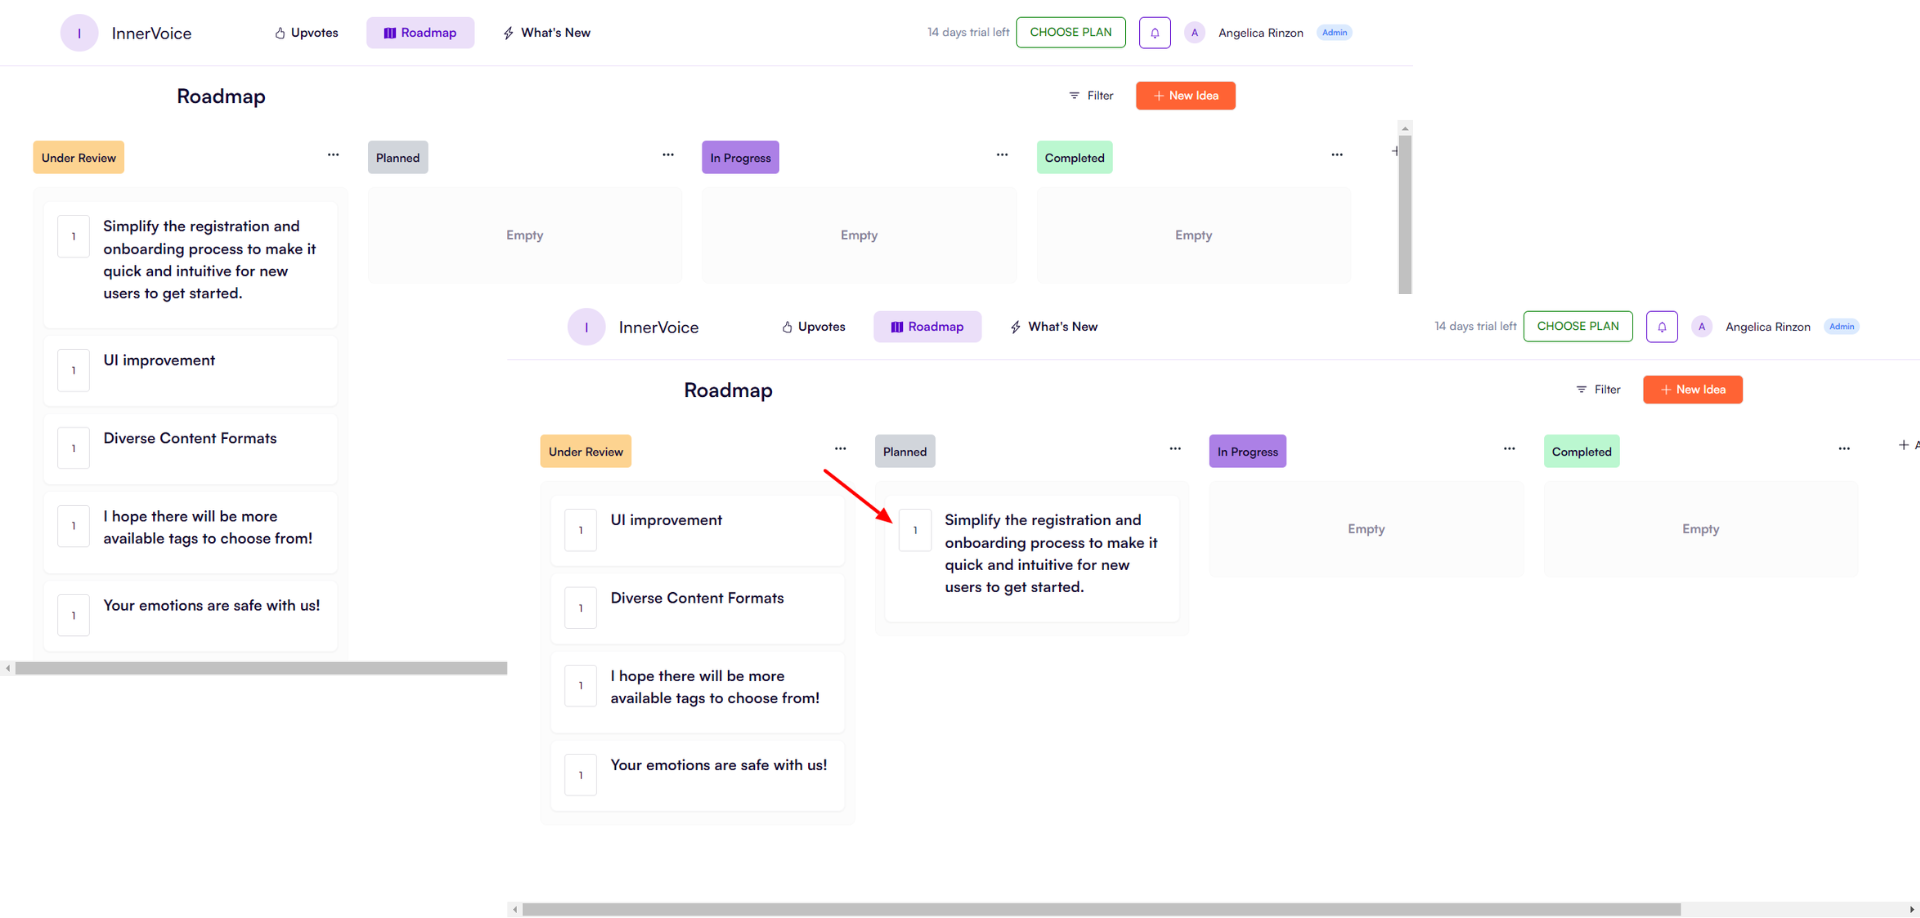
As an admin, you can drag and drop items under different columns: Under Review, Planned, In Progress, Completed.
This way, the product users will also see what ‘ideas’ were considered and are being tested, resulting in enhanced customer involvement and satisfaction.
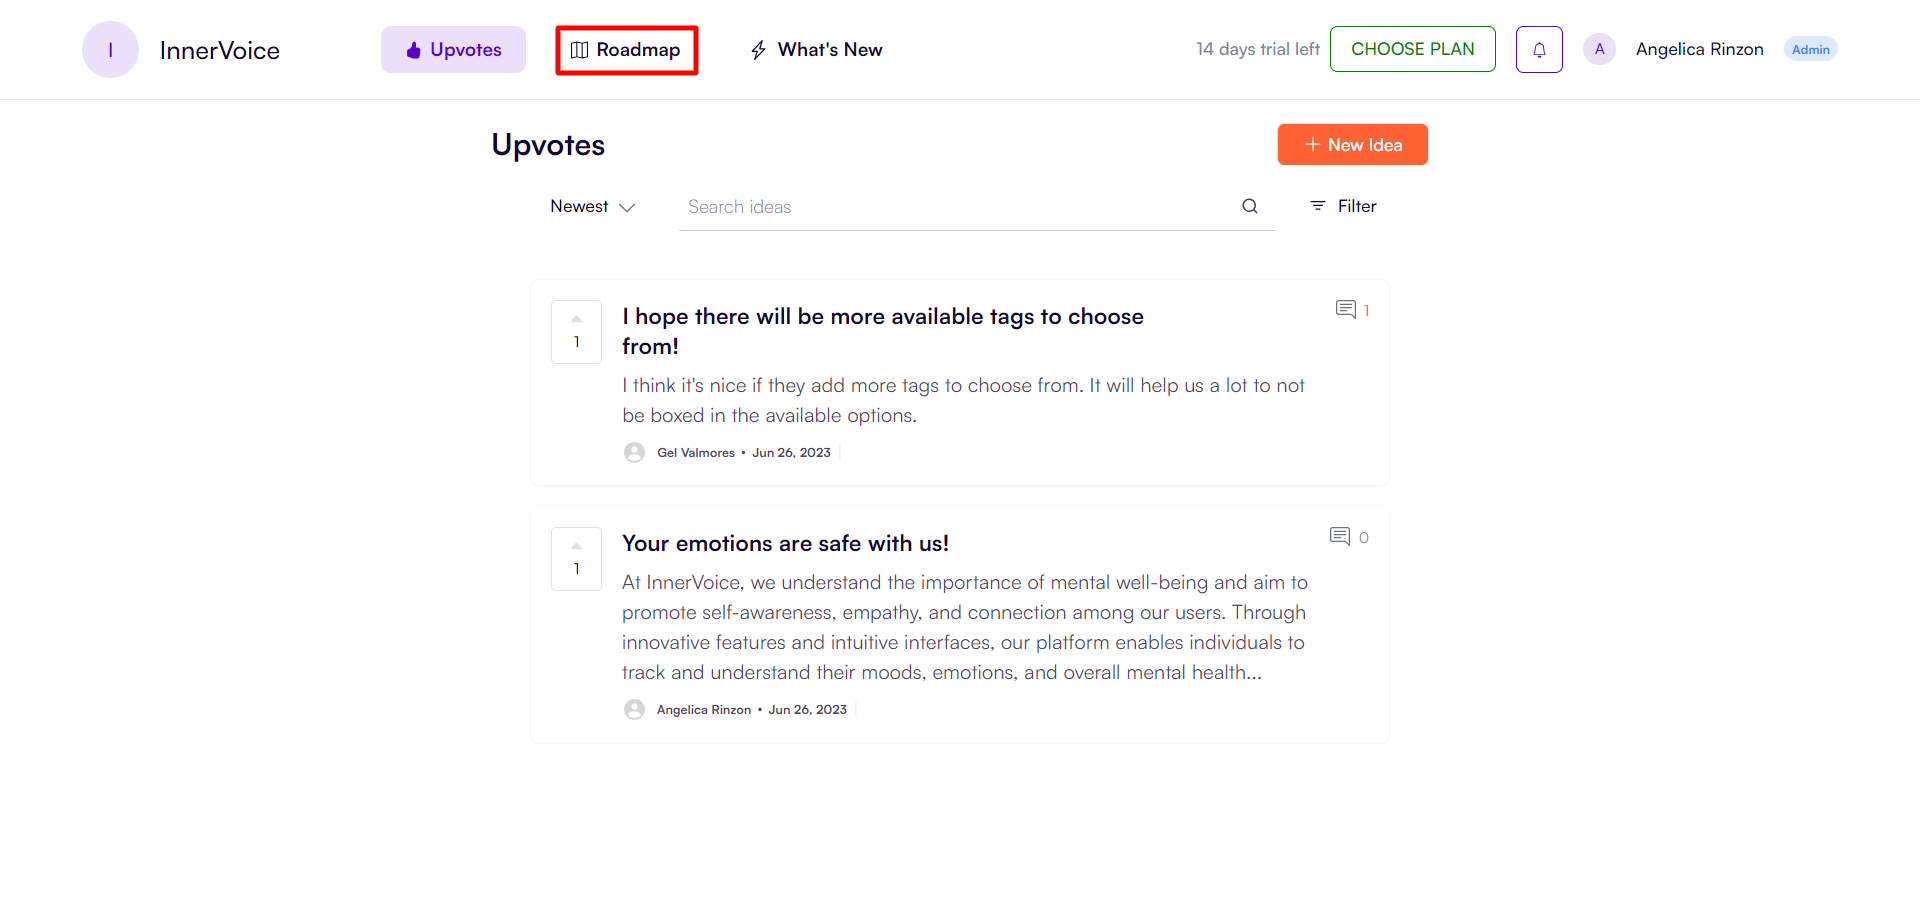
What users’ ‘Roadmap’ look like:
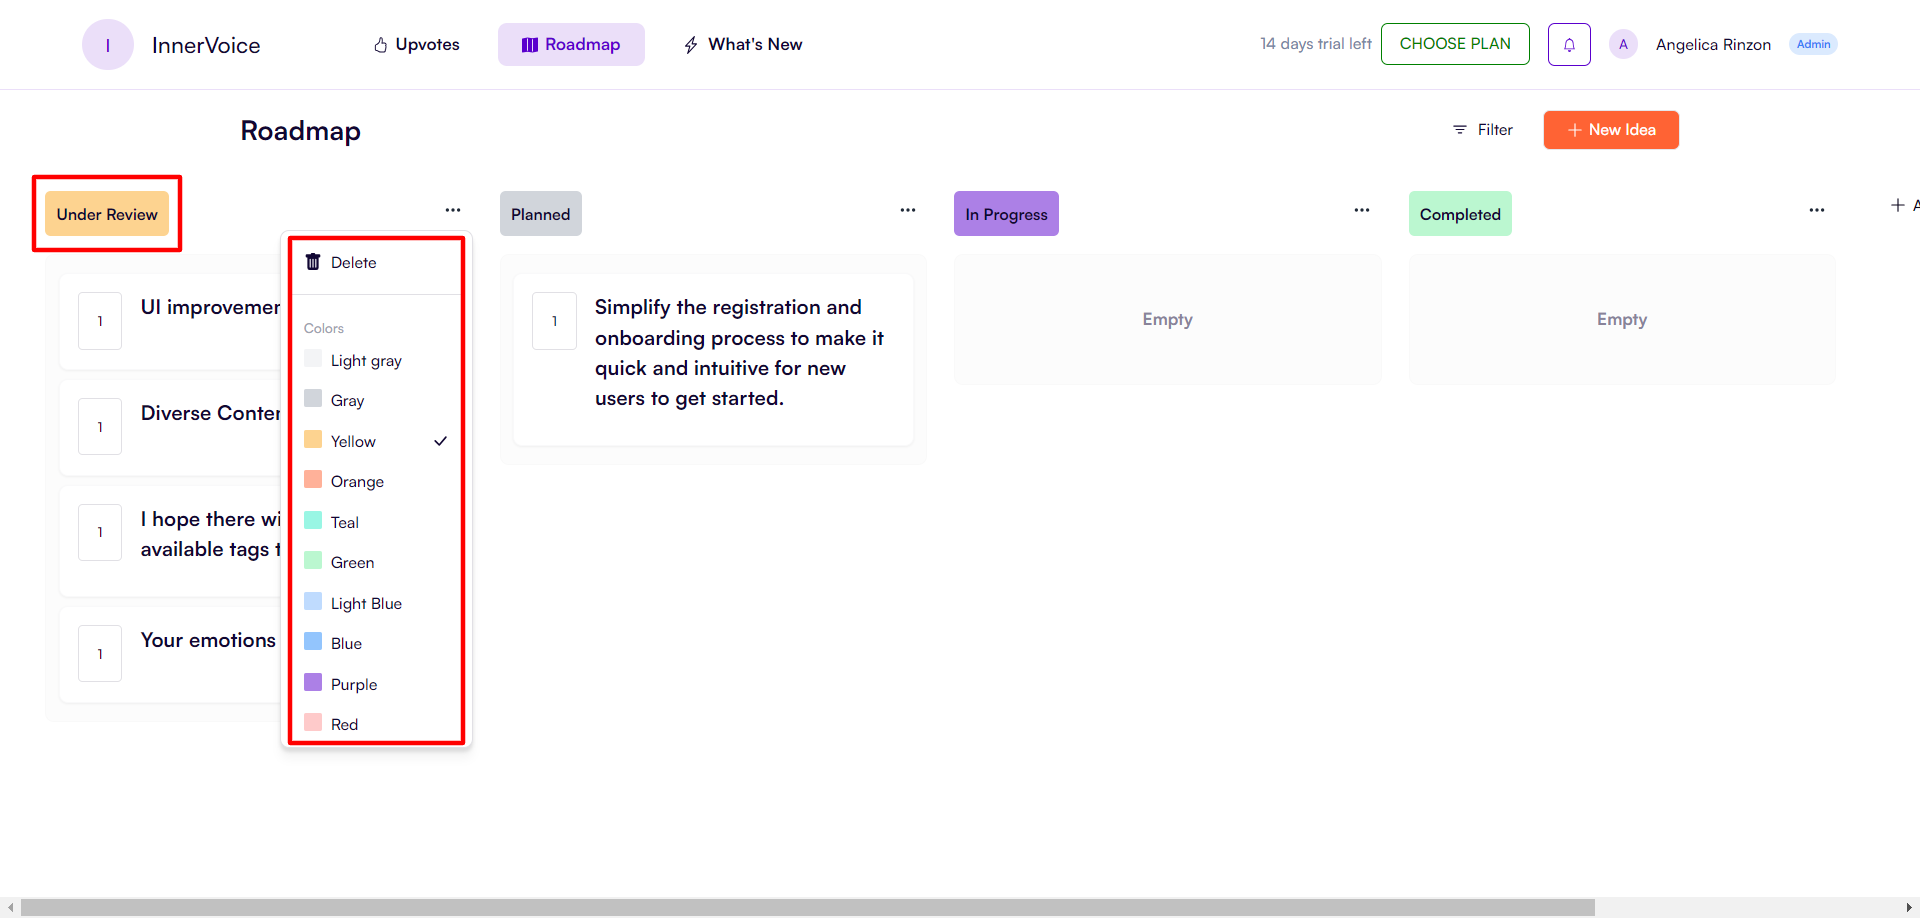
You can also change the column titles’ colors to your liking/brand colors.
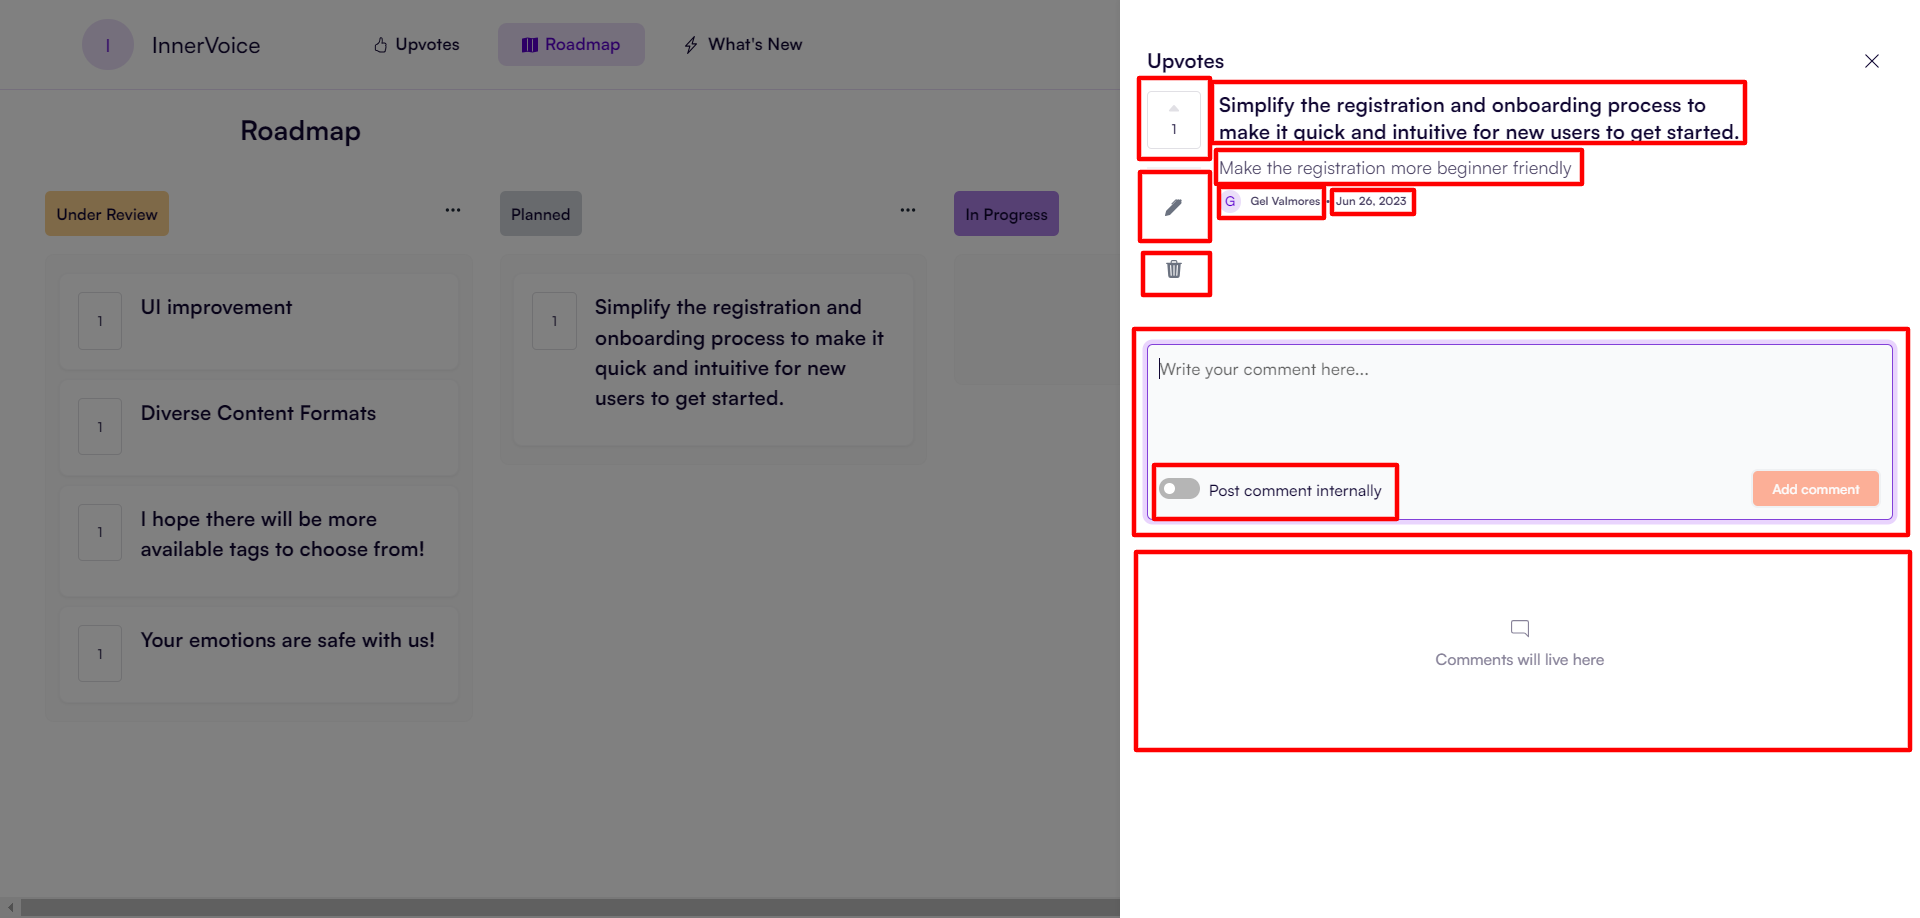
When you click an item, you will see more details about it, like the item title and description, the author’s name and date posted, the number of votes, the edit button, the delete button, comment box where you can post comments internally or publicly, and the list of comments made by the admin and/or the users.
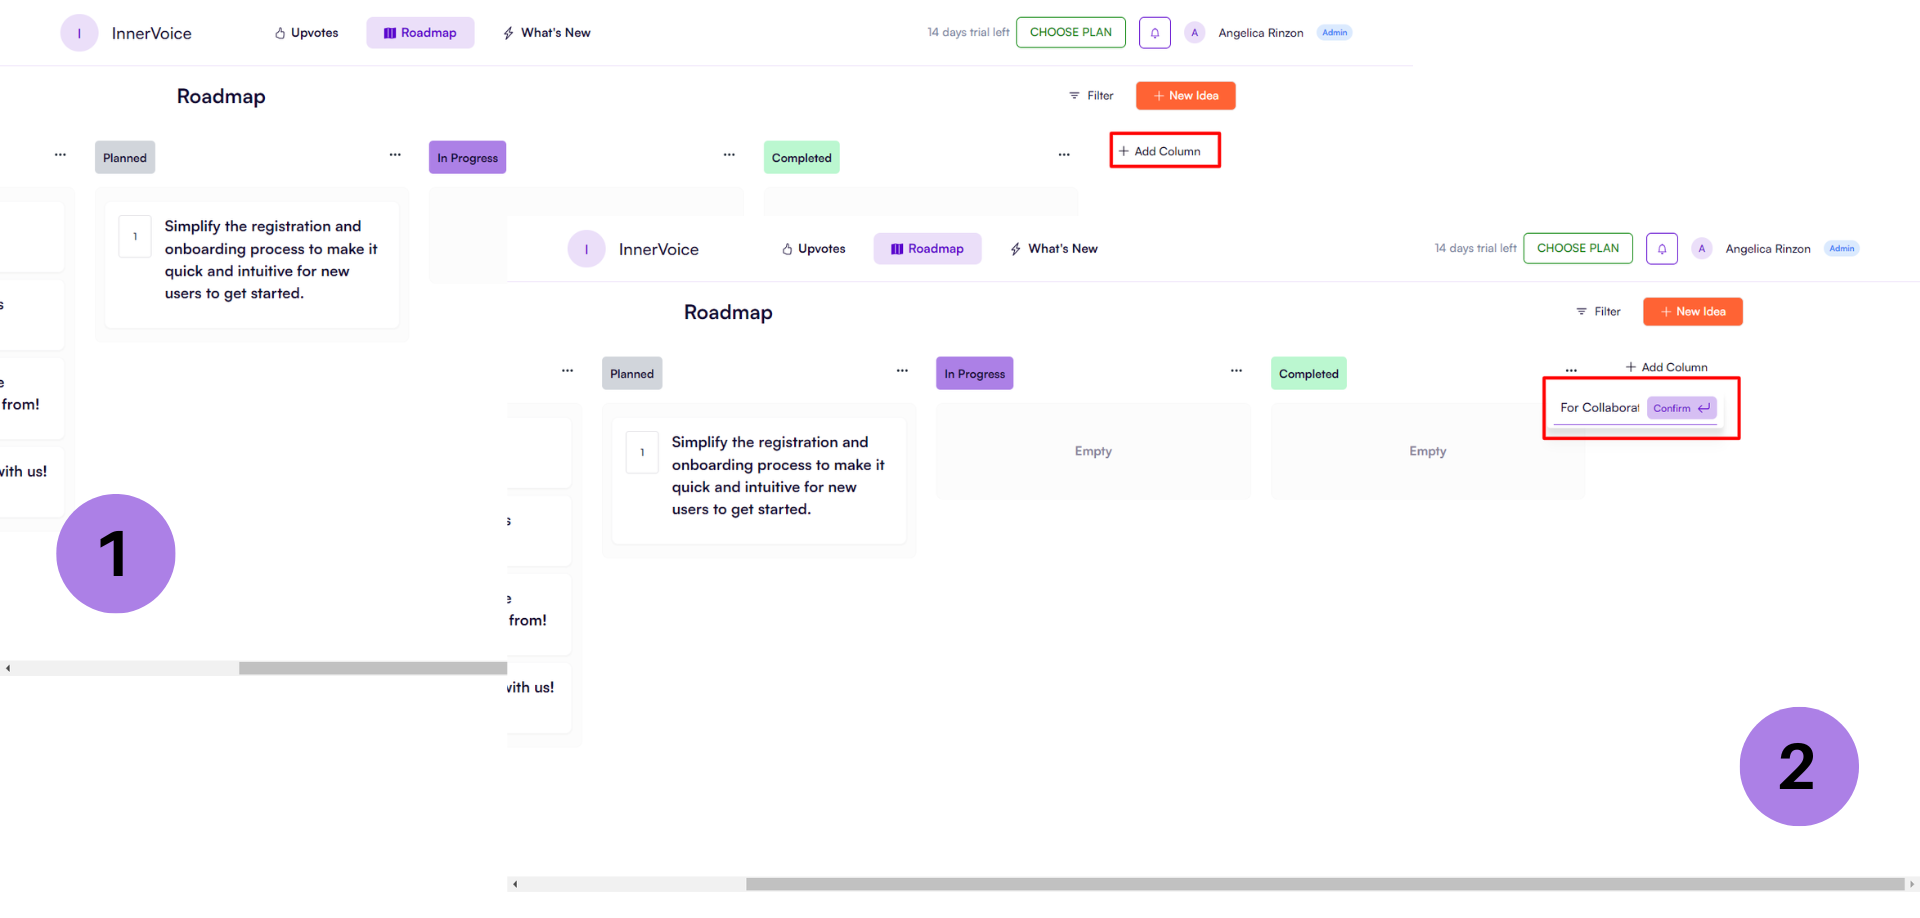
3. Creating a Roadmap
As an admin, you can create and add new columns to your roadmap should you need to. To do this, click the ‘Add Column’, add a column title, and click ‘Confirm’. You need to choose a colour for the column. You can also move the columns around in a similar way to the ideas.
Note: If you delete a column, all the ideas from that column will move to the leftmost column. You can also edit the column name and colour after you’ve created it.
4. Using Filters
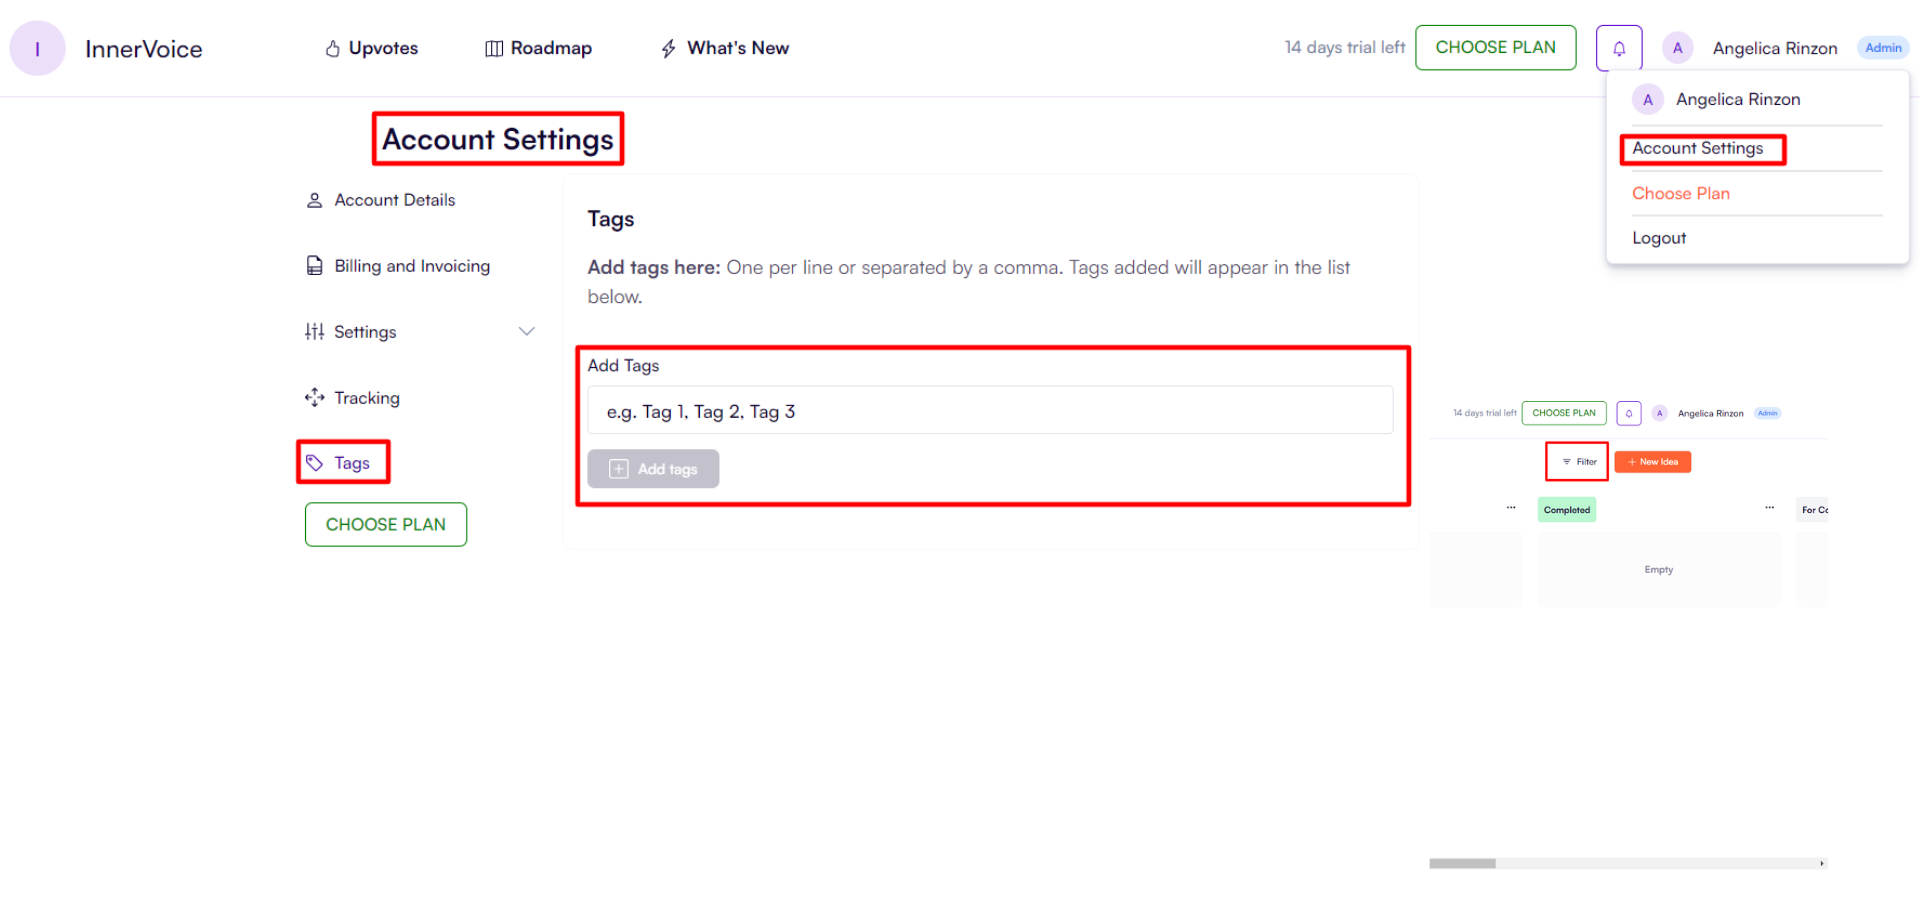
You can search for ideas in the roadmap using the tags available. These tags are set in the account setting, as shown below.