The "What's New" feature allows you to communicate and highlight the latest updates, changes, or announcements within your web application. By effectively managing "What's New," you can keep your users informed about new features, bug fixes, improvements, and other relevant information.
1. Accessing the "What's New" Admin Panel
Open your web browser and navigate to the URL: https://app.producthq.io/whatsnew-admin.
Log in to your account with the appropriate credentials.
Once logged in, you should be directed to the admin panel for managing the "What's New" section.
2. Adding New Entries
Click on the "New Post" button to create a new post.
Provide a title for the post: Enter a concise and descriptive title that captures the essence of the update or announcement.
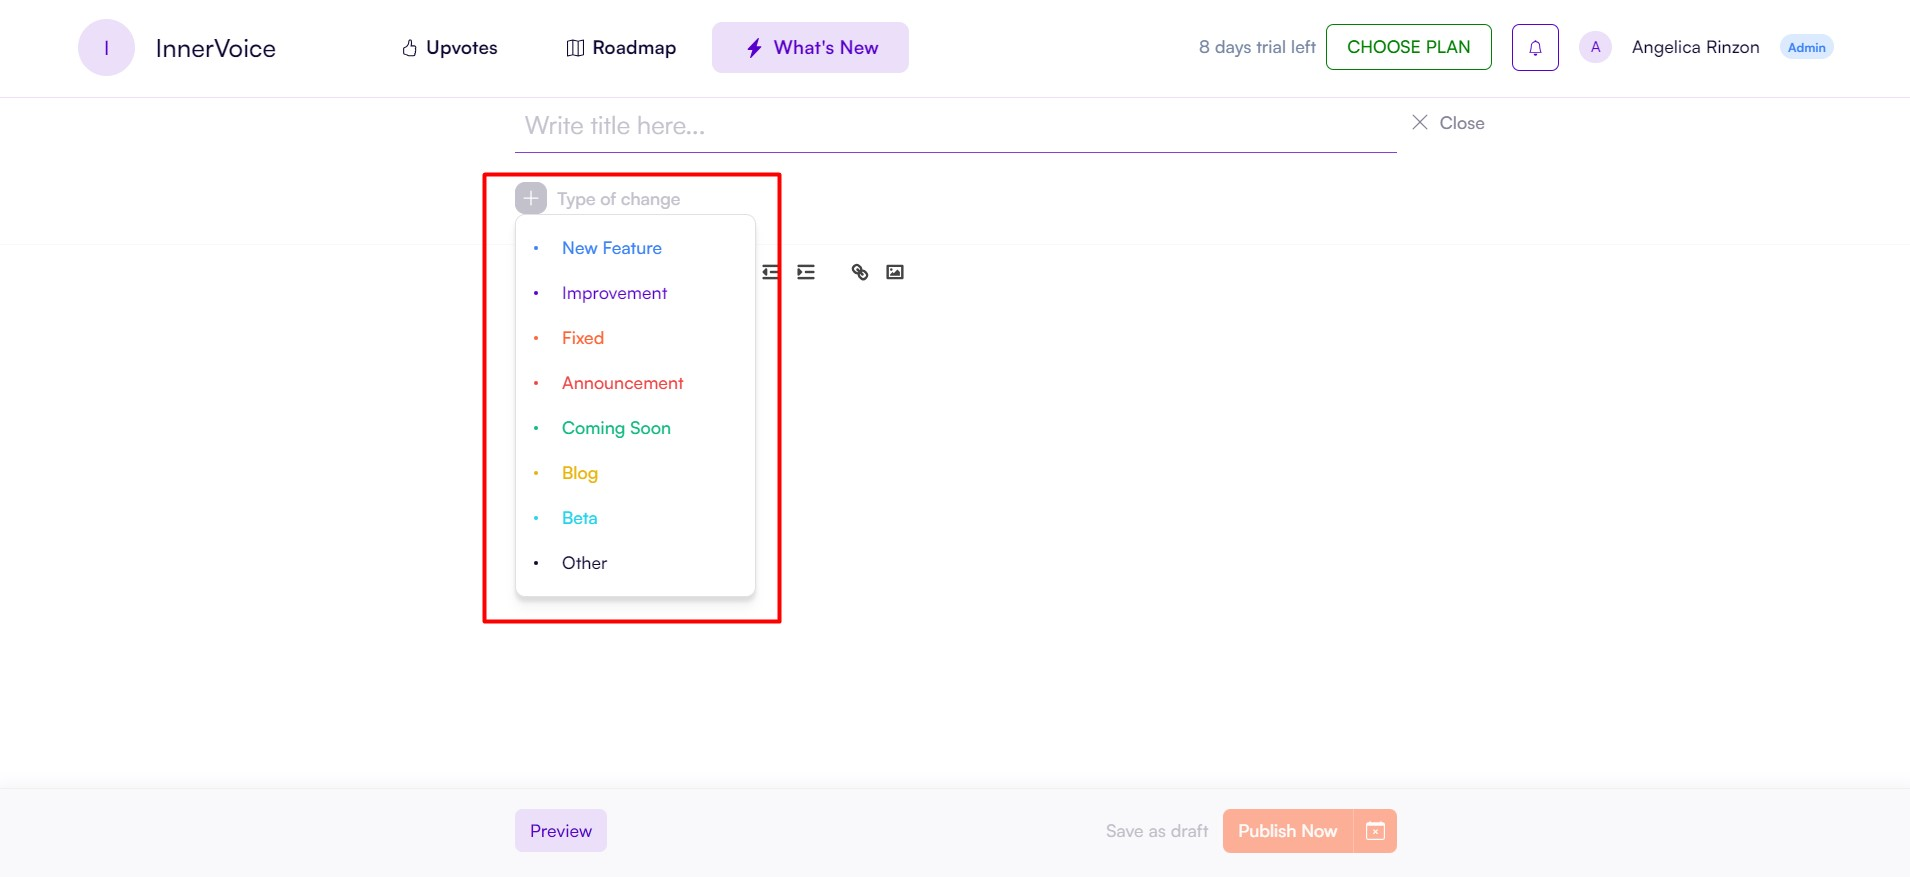
In the "Type of Change" field, choose one or more of the options available; New Features, Improvement, Fixed, Announcement, Coming Soon, Blog, Beta, or Other.
In the description area, write your content. You can use formatting options, such as headings, lists, or links, to enhance readability from the menu option at the top of the description section.
You can upload images to better help illustrate your new update. This can help provide visual context or demonstrate new features.
Publish the post by clicking the "Publish now"
3. Publishing and Scheduling
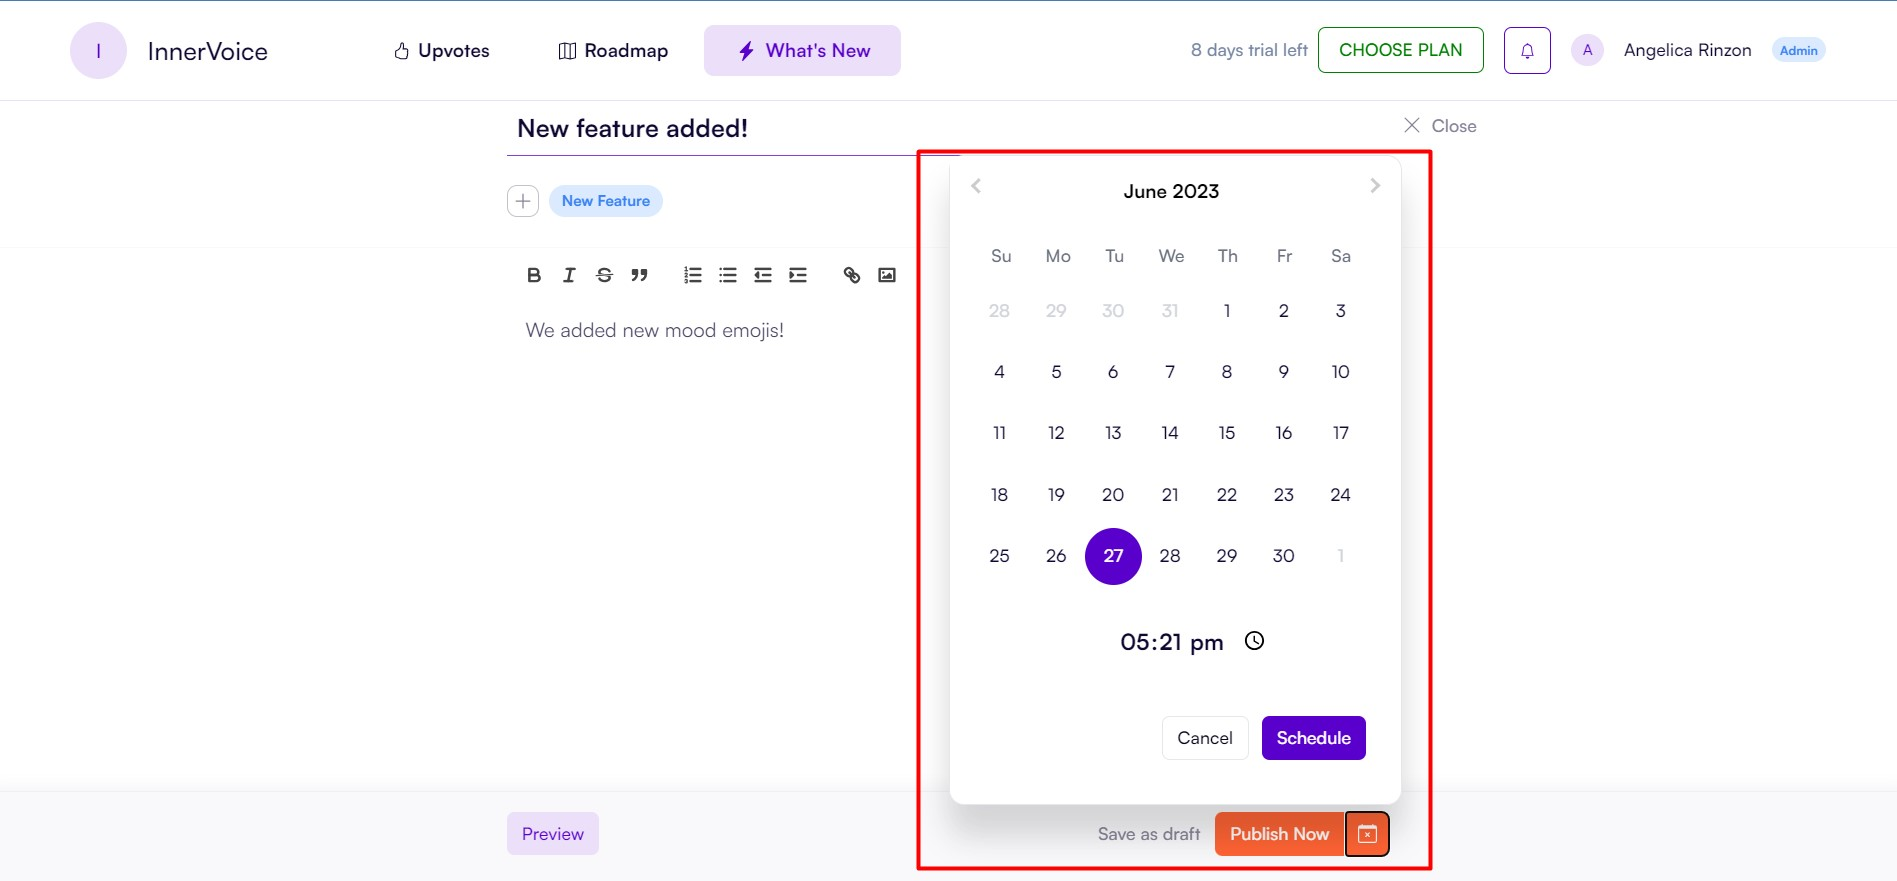
There are two ways you can make a post public. Firstly, you can simply click the Publish Now button and the post will be made public immediately. Alternatively, you can click the little calendar icon on the right to bring up a calendar. This allows you to choose a time and date you would like to make the post public.
4. Managing Existing Entries
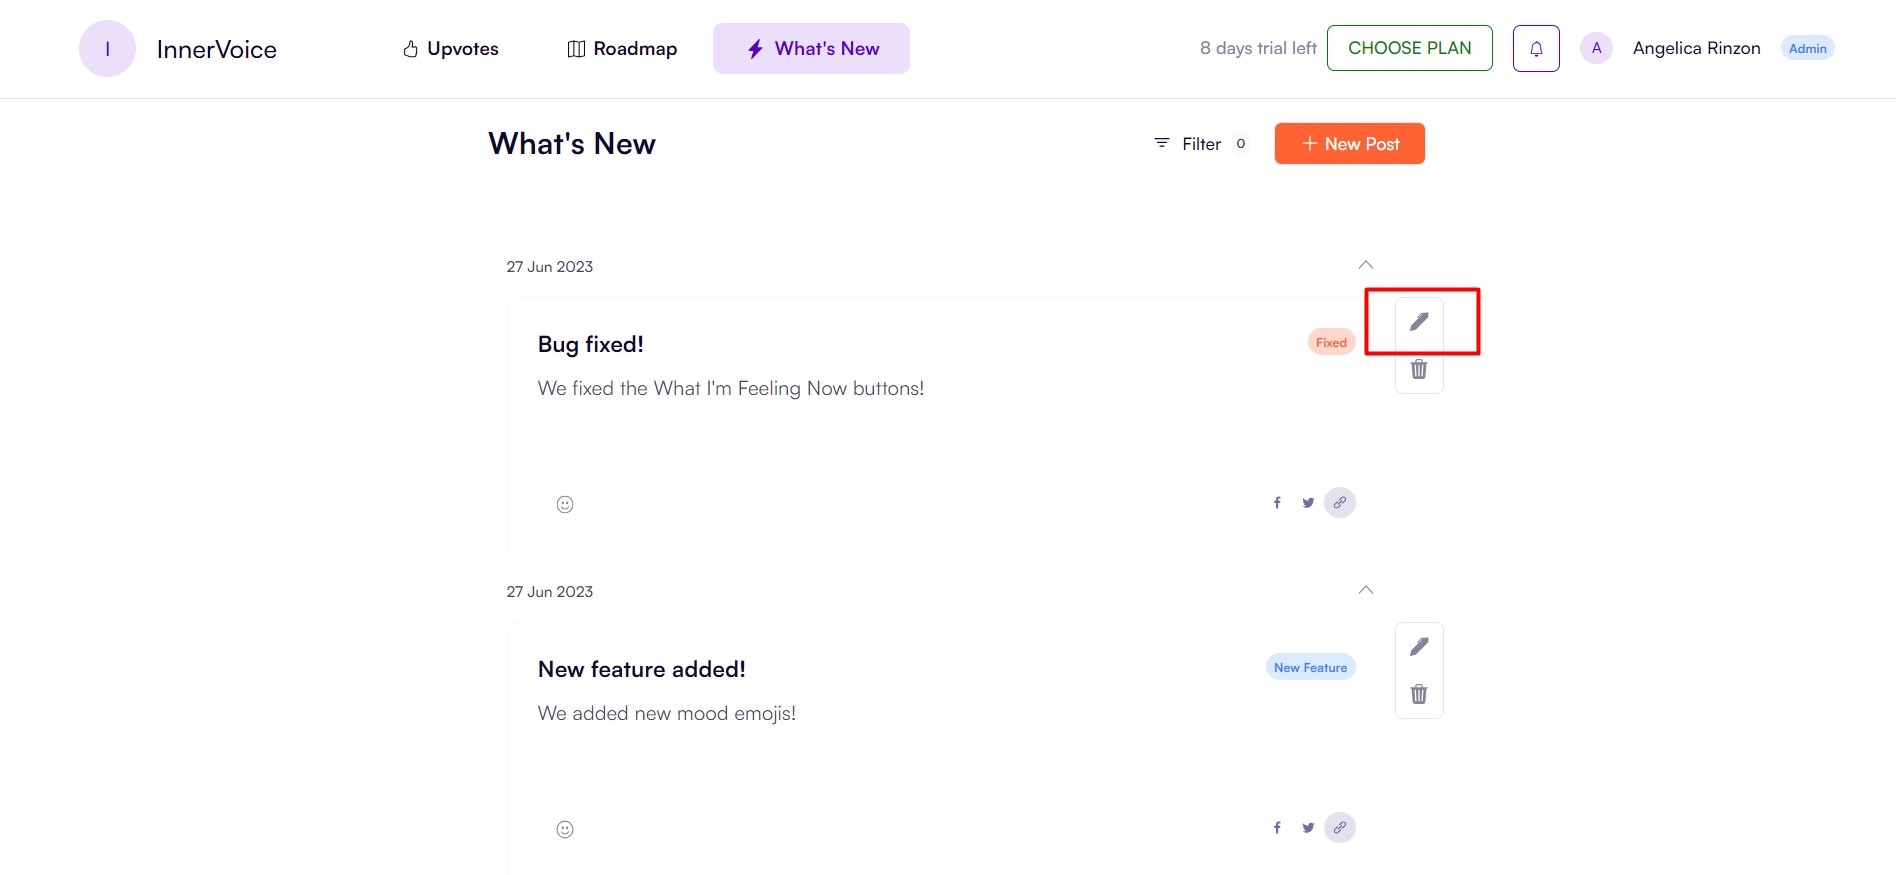
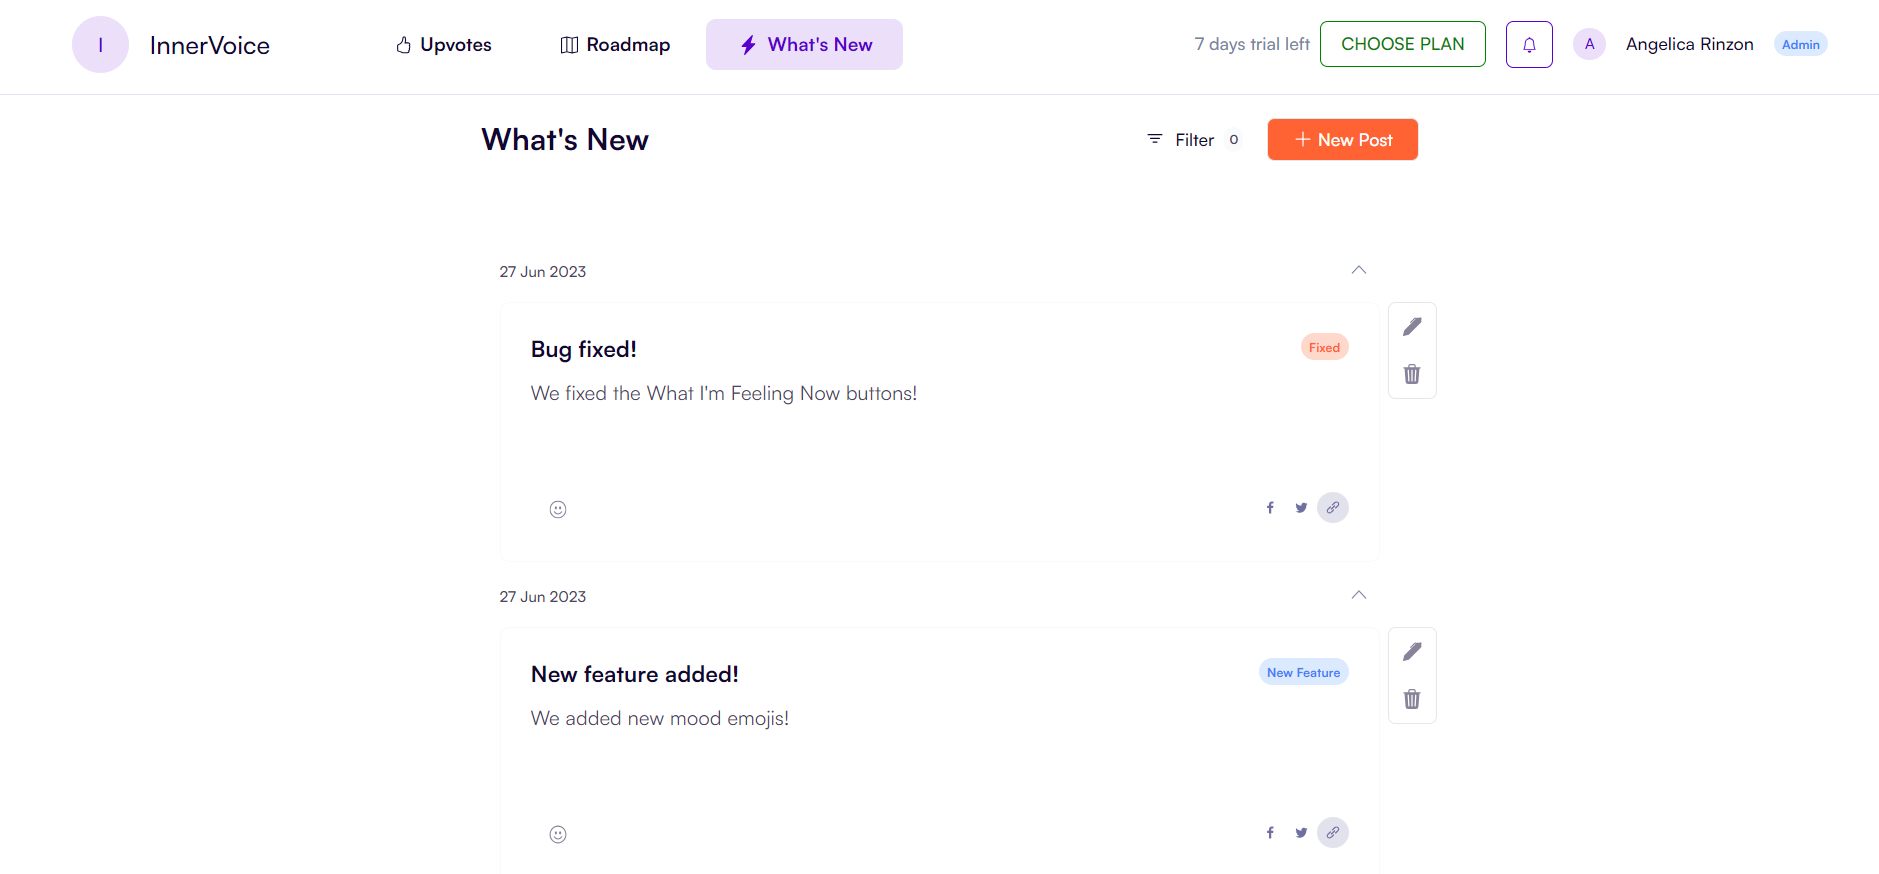
In the admin panel, you should see a list of existing entries for the "What's New" section.
- To edit an existing entry, locate the entry within the list and click on the corresponding "Edit" or the pen icon.
- Make the necessary changes to the entry's title, content, media, or publish date.
- Save the changes to update the entry.
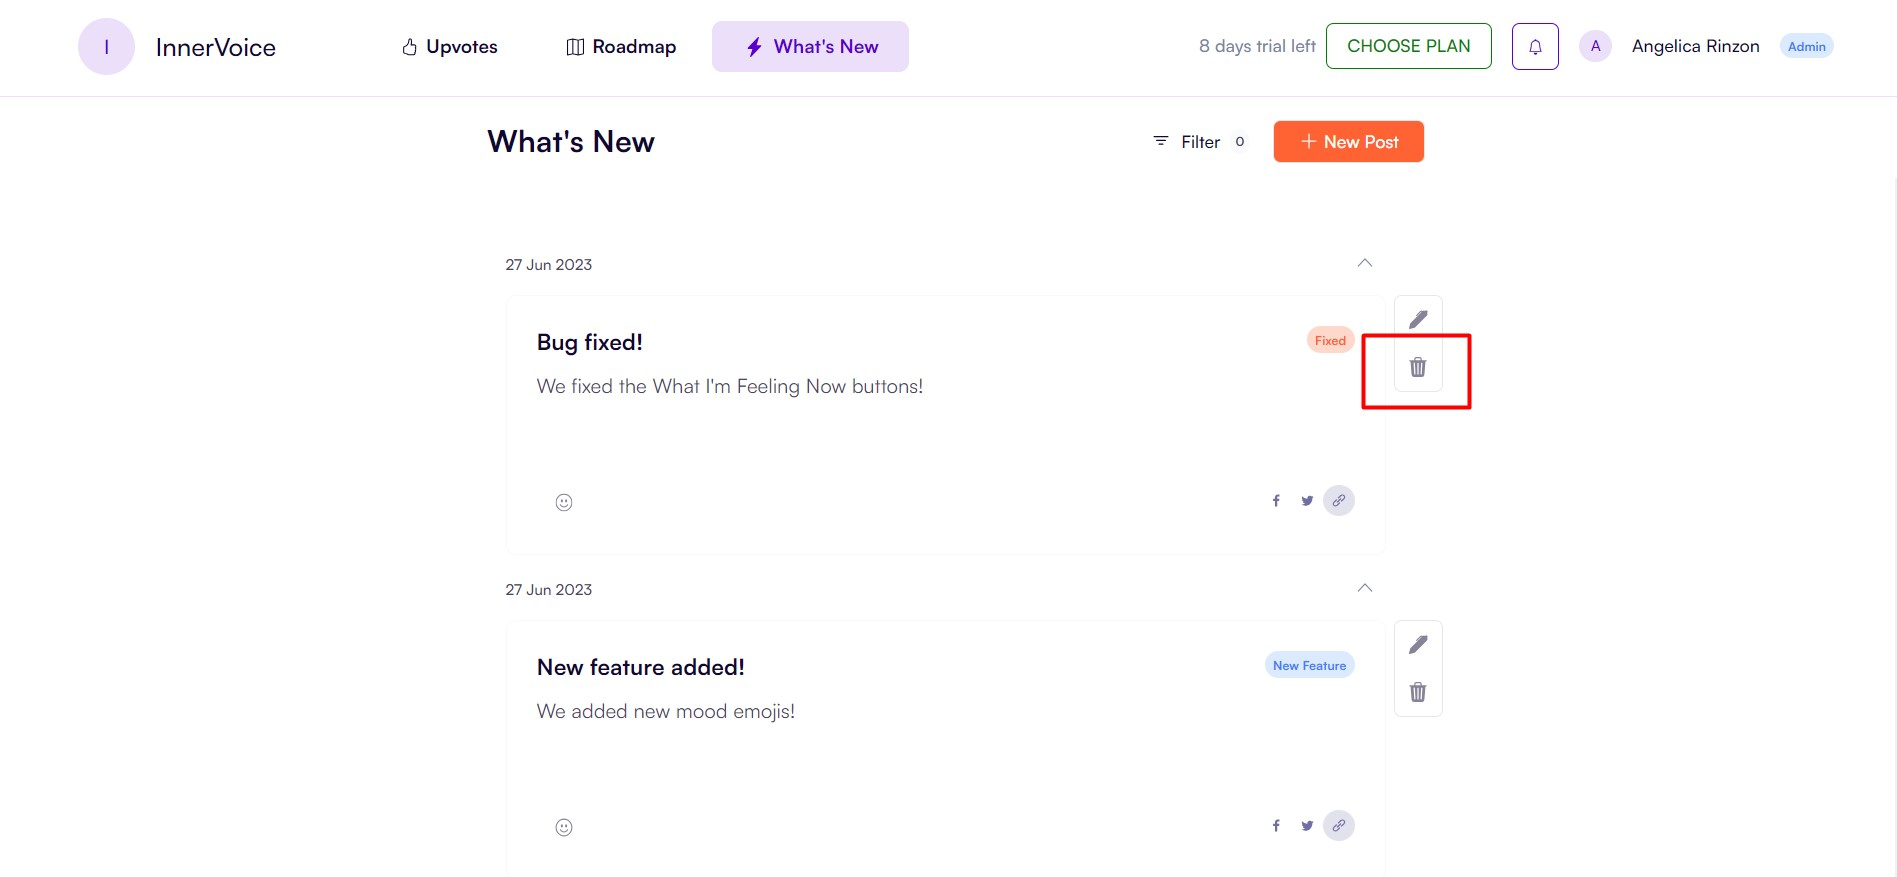
5. Deleting Entries
To remove an entry from the "What's New" section, locate the entry within the admin panel's list.
- Click on the "Delete" or the trash icon associated with the entry.
- Confirm the deletion when prompted. You can also convert the entry to a "draft."
Public View
Once your posts are published, users can now view, react, comment, and share the posts.
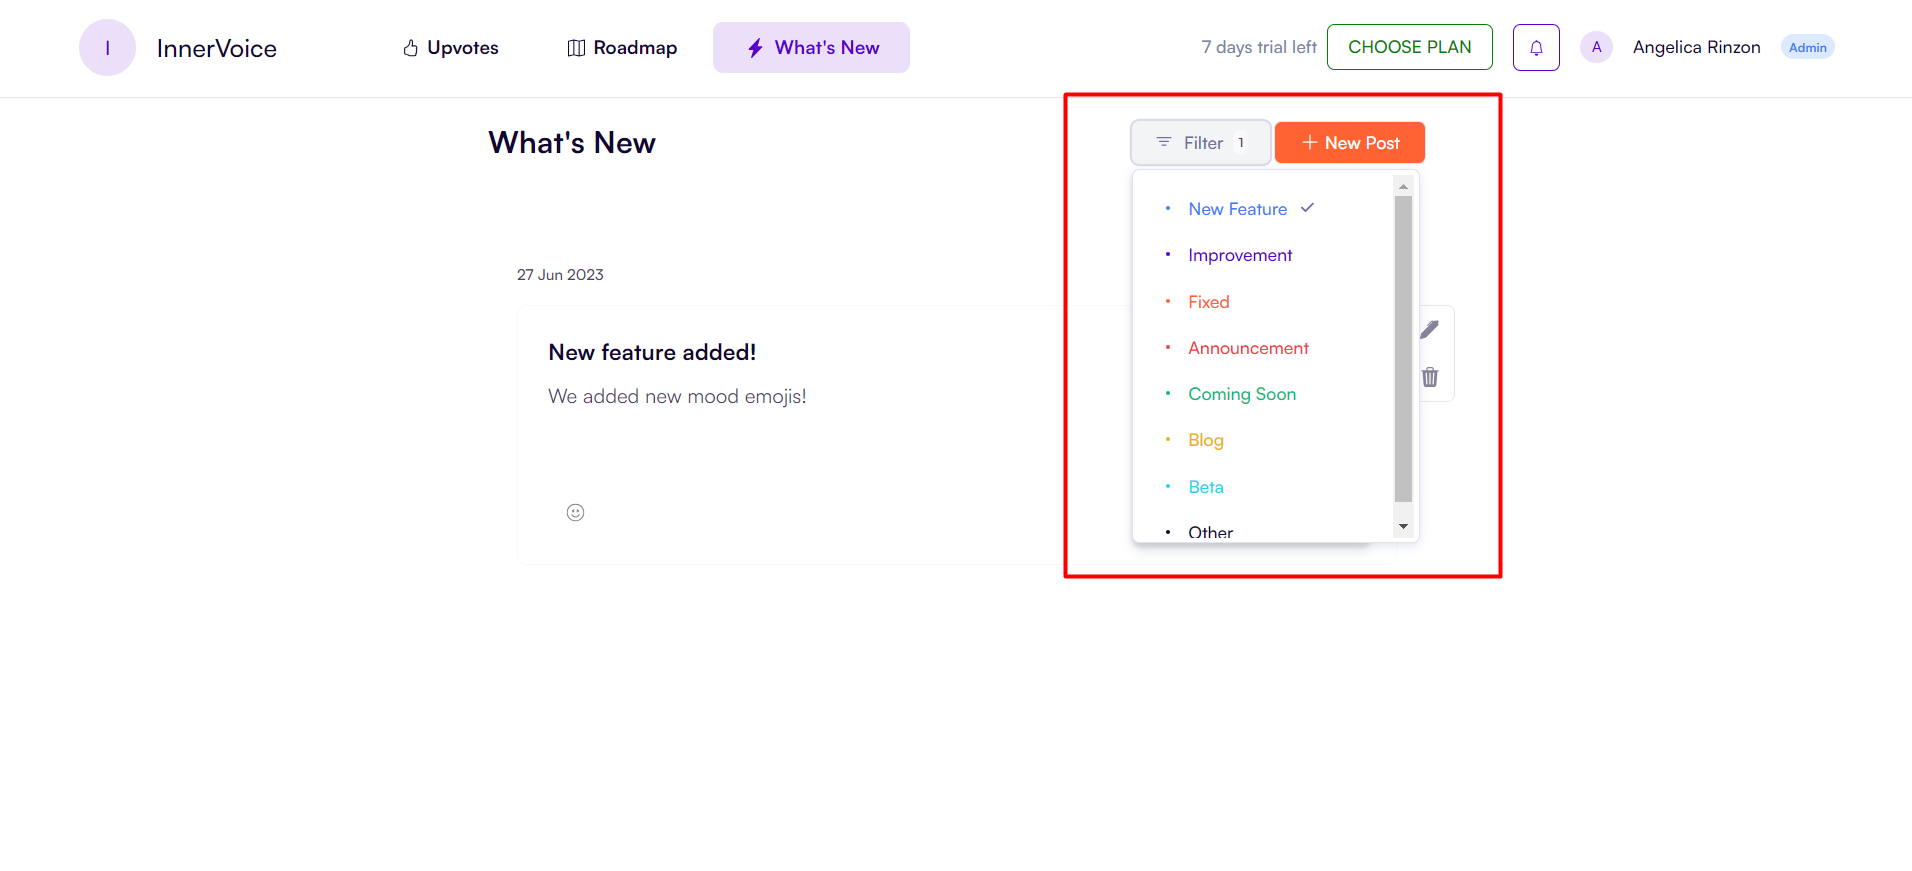
6. Filtering Ideas
The 'What's New' section includes filtering options to help you find relevant entries quickly. Common options include:
Filter by tags: This enables you to display ideas with specific tags (e.g., New Feature, Improvement, Fixed, Announcement, Coming Soon, Blog, etc.).
You can select more than one tag.
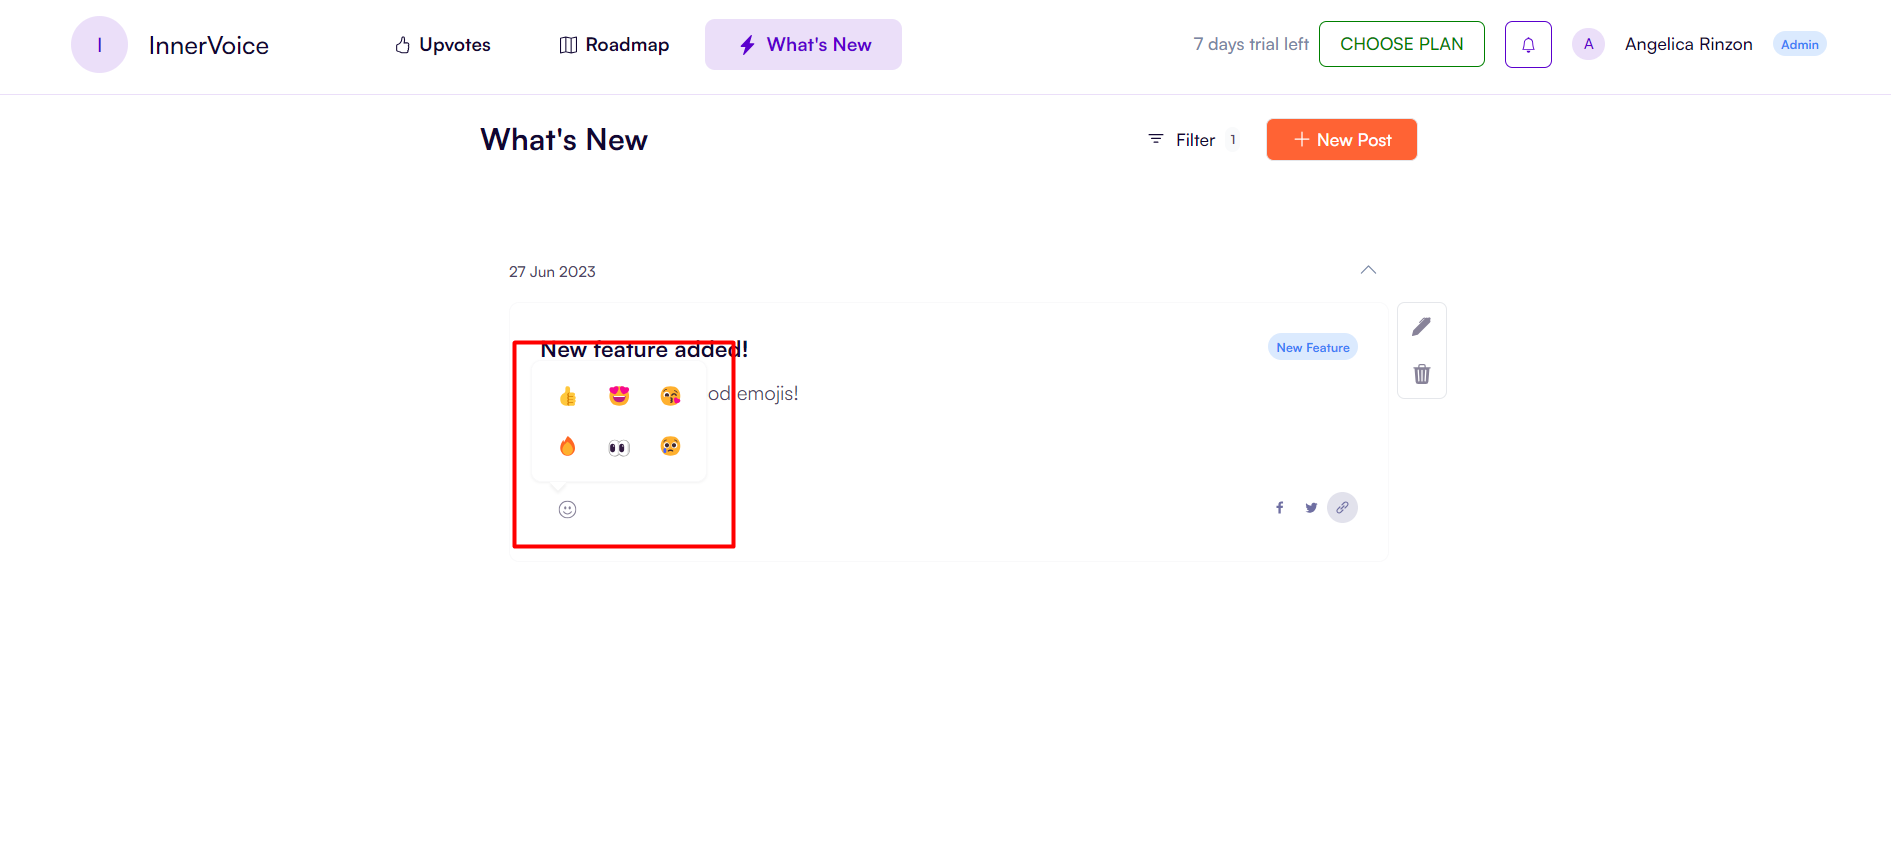
7. Emoji Reactions
Both users and admins can engage by locating the post on which they want to react with an emoji. Just hover the mouse over the smiley icon and click.
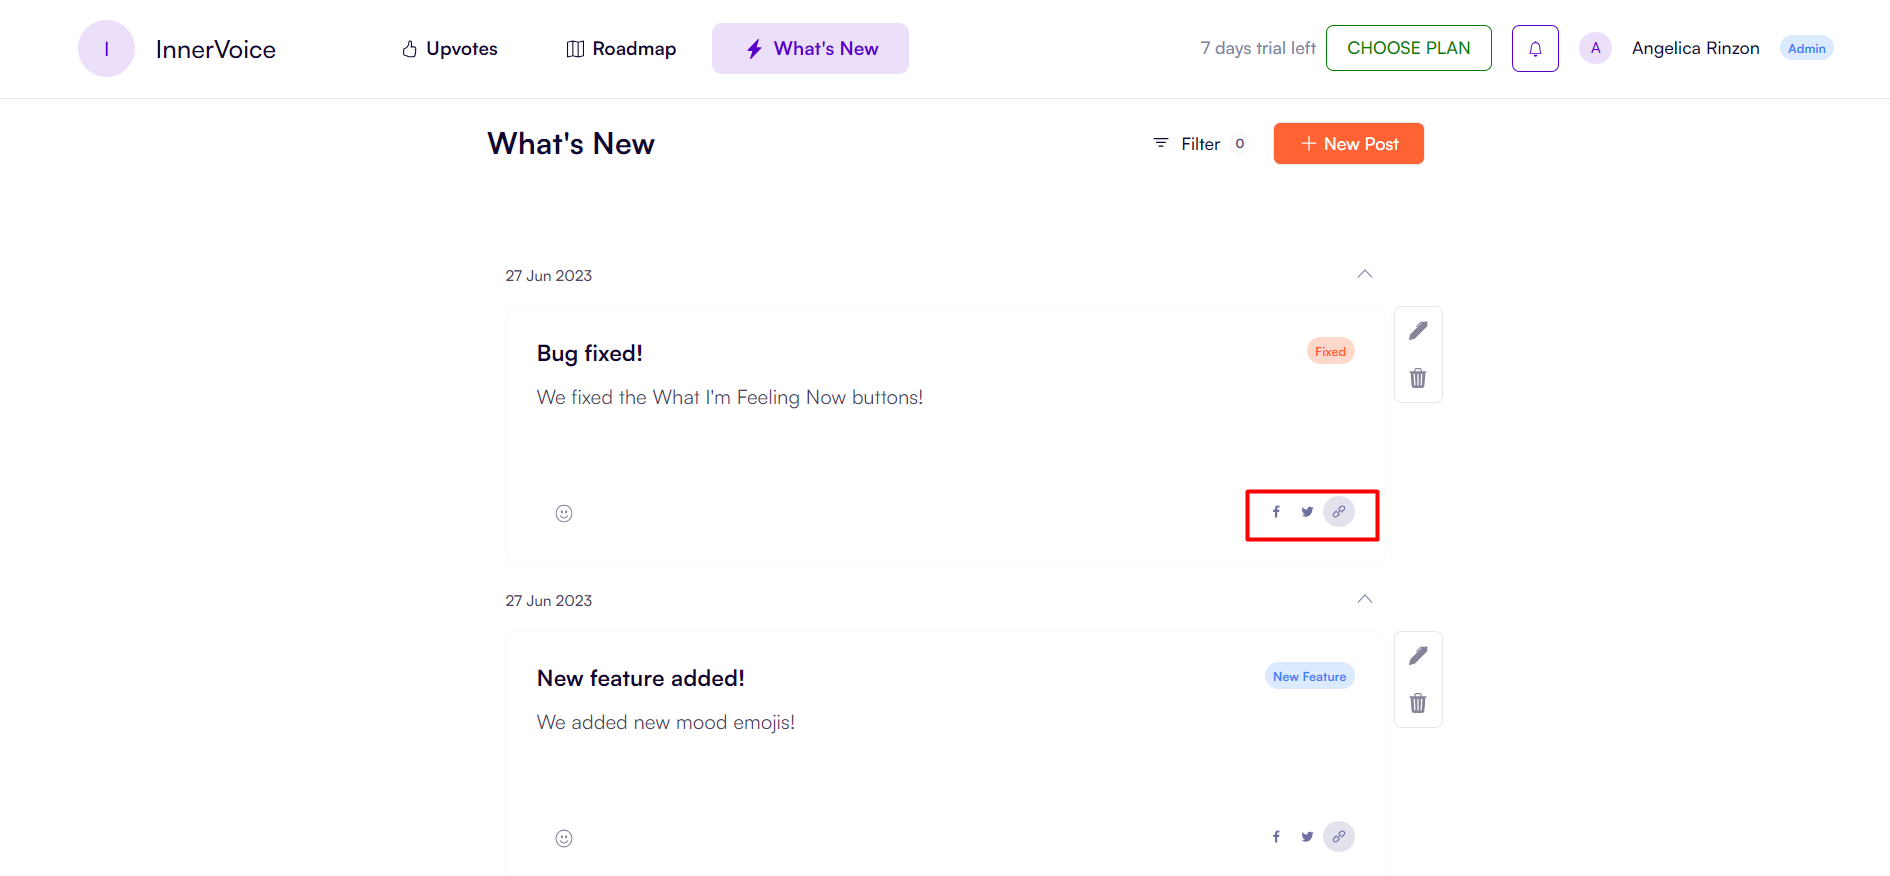
8. Social Sharing
With this feature, you can share your post updates on social platforms.
Facebook and Twitter: click the Facebook or the Twitter icon, and a new window will automatically open. Write down your thoughts and click publish.
Shareable link: click the icon beside Twitter to copy the link. This link can be shared to any other platforms (e.g., social media, email, documents)